In this tutorial, we will manage and set up the environment to build a ReactJS project including git integration. Following are the tools and technologies that are required to start the reactJS project from scratch also, we will manage the source code over the git.
Required tools and technologies
- Visual Studio Code
- ReactJS
- Tailwind CSS
- DaisyUI (Tailwind CSS Component library)
Clone “Pre-installed GitHub repository” and set up the project
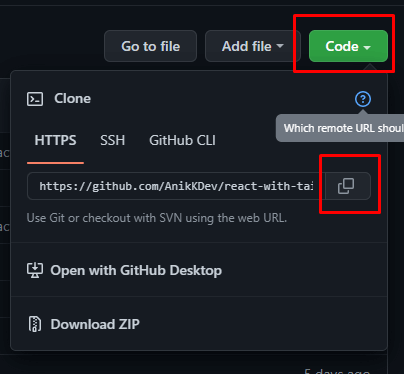
- Go to this GitHub repository and copy the GitHub link.
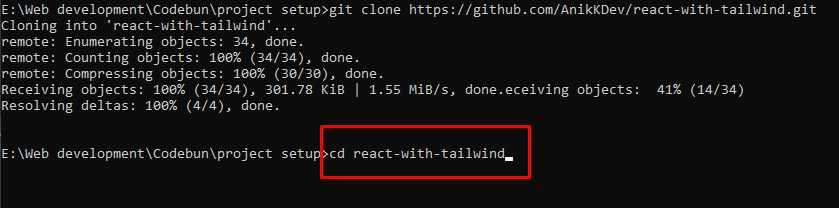
- Open the command prompt and type
git clone https://github.com/AnikKDev/react-with-tailwind.gitto clone this repository. After that, hit enter.

- Open command prompt from this downloaded folder (repository).

- Type
npm installand hit enter. It will download all the dependencies and the node-modules folder for this project.

It will take a little time to install all the necessary files for the project.

- After done installing dependencies, create a new repository for this project in GitHub and copy the git remote link. Then change the GitHub remote origin for this project by simply typing,
git remote set-url origin your-git-repository-link(check the git remote link bygit remote -vfor this project. ) - Open this project with Visual Studio Code and run the server via command prompt for this project by typing
npm start

Install tailwind CSS Component library (e.g. DaisyUI, Flowbite CSS, etc.)
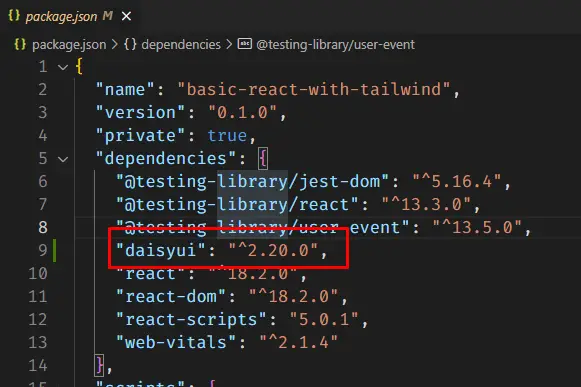
- Install DaisyUI in the project folder with this command,
npm i daisyuiAfter installing DaisyUI, it will be added to the dependencies list of this project. Which can be seen in package.json file.
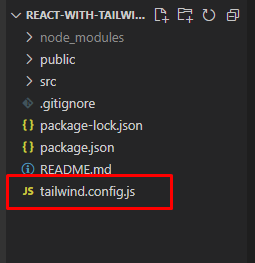
- Open tailwind.config.css file from the project folder
- Set DaisyUI as CSS plugins.
plugins: [require("daisyui")]
/** @type {import('tailwindcss').Config} */
module.exports = {
  content: ["./src/**/*.{html,js}"],
  theme: {
    extend: {},
  },
  plugins: [require("daisyui")],
}
Now the project is ready to continue.