User authentication is pervasive in modern web applications. User authentication is a security mechanism used to identify whether a user is who they claim to be and to limit unauthorized access to member-only areas in a web application. In this tutorial, I’ll show you how to create a simple user registration and login system using Angularjs.
AngularJS application layout
We will create a basic layout ie index.html file where all our app views will be loaded. Let’s create an index.html file and put the following code in it −
<!DOCTYPE html>
<html ng-app="app">
<head>
<meta charset="utf-8" />
<title>AngularJS User Registration Login Example - Codebun</title>
<link rel="stylesheet" href="//netdna.bootstrapcdn.com/bootstrap/3.1.1/css/bootstrap.min.css" />
<link rel="stylesheet" href="style.css">
</head>
<body>
<div class="jumbotron">
<div class="container">
<div class="header">AngularJS User Registration Login Example - Codebun</div>
<div class="col-sm-8 col-sm-offset-2">
<div ng-view></div>
</div>
</div>
</div>
<script src="//code.jquery.com/jquery-3.1.1.min.js"></script>
<script src="//code.angularjs.org/1.6.9/angular.min.js"></script>
<script src="//code.angularjs.org/1.6.9/angular-route.min.js"></script>
<script src="//code.angularjs.org/1.6.9/angular-cookies.min.js"></script>
<script src="app.js"></script>
<script src="homeController.js"></script>
<script src="loginController.js"></script>
<script src="registerController.js"></script>
<script src="userService.svc.js"></script>
<script src="authenticationService.js"></script>
</body>
</html>
AngularJS Application
Every Angular application starts by creating an Angular module. A module is a container that contains different parts of your application such as controllers, services, etc.
In this step, we will create a main javascript app.js file that will contain all the necessary configurations to run an angularJS application. In this file, we will also configure the application routes using the AngularJS UI Router module.
Let’s create an app.js file and put the following code in it
(
function () {
'use strict';
angular
.module('app', ['ngRoute', 'ngCookies'])
.config(config)
.run(run);
config.$inject = ['$routeProvider', '$locationProvider'];
function config($routeProvider, $locationProvider) {
$routeProvider
.when('/', {
controller: 'LoginController',
templateUrl: 'login.html',
controllerAs: 'vm'
})
.when('/home', {
controller: 'HomeController',
templateUrl: 'home.html',
controllerAs: 'vm',
})
.when('/register', {
controller: 'RegisterController',
templateUrl: 'register.html',
controllerAs: 'vm'
})
.otherwise({ redirectTo: '/login' });
}
run.$inject = ['$rootScope'];
function run(){
console.clear();
}
})();
AngularJS template and controller
As you can see in the routing configuration, each route you specify has a template and controller attached to it. The Angularjs template file contains all the HTML that is used to display the route-specific page.
The angularjs controller holds the actual business logic attached to the route. In this step, we will create separate template and driver files for user registration, login, and homepage.
Create a registration page in AngularJS
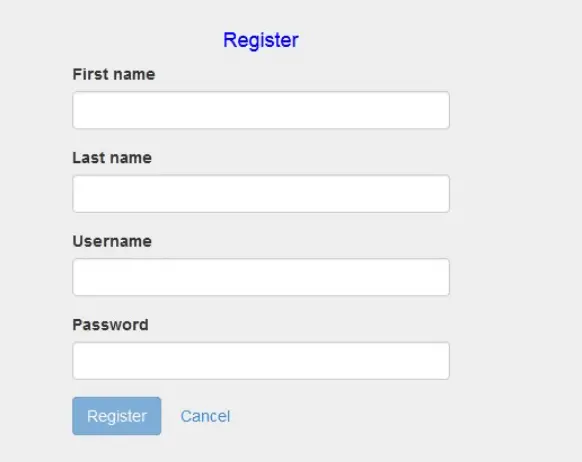
In this step, we will create a registration form that will allow users to create a new account by filling out a web form. The user’s registration form will contain First Name, Last Name, Username, and Password along with Register and Cancel buttons.
Let’s create a register.html file at the root of your project and put the following code in it.
<div class="col-md-6 col-md-offset-3">
<h4 style="text-align:center;color:blue">Register</h4>
<form name="form" ng-submit="vm.register()" role="form">
<div class="form-group" ng-class="{ 'has-error': form.firstName.$dirty && form.firstName.$error.required }">
<label for="username">First name</label>
<input type="text" name="firstName" id="firstName" class="form-control" ng-model="vm.user.firstName" required />
<span ng-show="form.firstName.$dirty && form.firstName.$error.required" class="help-block">First name is required</span>
</div>
<div class="form-group" ng-class="{ 'has-error': form.lastName.$dirty && form.lastName.$error.required }">
<label for="username">Last name</label>
<input type="text" name="lastName" id="Text1" class="form-control" ng-model="vm.user.lastName" required />
<span ng-show="form.lastName.$dirty && form.lastName.$error.required" class="help-block">Last name is required</span>
</div>
<div class="form-group" ng-class="{ 'has-error': form.username.$dirty && form.username.$error.required }">
<label for="username">Username</label>
<input type="text" name="username" id="username" class="form-control" ng-model="vm.user.username" required />
<span ng-show="form.username.$dirty && form.username.$error.required" class="help-block">Username is required</span>
</div>
<div class="form-group" ng-class="{ 'has-error': form.password.$dirty && form.password.$error.required }">
<label for="password">Password</label>
<input type="password" name="password" id="password" class="form-control" ng-model="vm.user.password" required />
<span ng-show="form.password.$dirty && form.password.$error.required" class="help-block">Password is required</span>
</div>
<div class="form-actions">
<button type="submit" ng-disabled="form.$invalid || vm.dataLoading" class="btn btn-primary">Register</button>
<img ng-if="vm.dataLoading" src="data:image/gif;base64,R0lGODlhEAAQAPIAAP///wAAAMLCwkJCQgA" /> <!-- truncated line -->
<a href="#!/" class="btn btn-link">Cancel</a>
</div>
</form>
</div>
Now, we’ll create registerController.js file and define our registration controller. Let’s create registerController.js file and put the following code in it.
//registerController.js
(function () {
'use strict';
angular
.module('app')
.controller('RegisterController', RegisterController);
RegisterController.$inject = ['UserService', '$location'];
function RegisterController(UserService, $location) {
var vm = this;
vm.dataLoading = false;
vm.register = register;
function register() {
vm.dataLoading = true;
UserService.create(vm.user)
.then(function (response) {
if (response.success) {
alert('Registration successful');
$location.path('/');
} else {
alert(response.message);
vm.dataLoading = false;
}
});
}
}
})();
Create a Login page in AngularJS
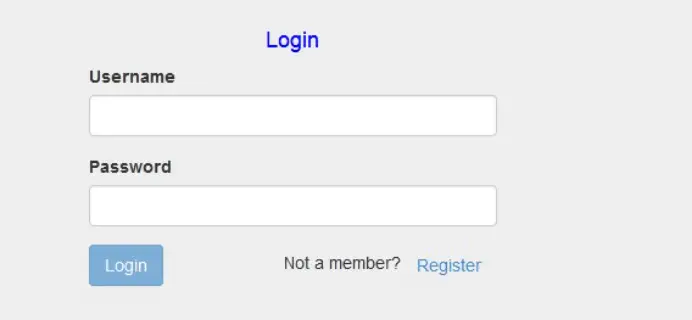
In this step, we will create a simple login form with two input fields (Username and Password) along with a login button. Here the user enters his username and password and submits the login form using the login button.
After submitting the login form, it calls the login() function from our login controller (loginController.js), which then uses the Authentication Service (AuthenticationService.js) to authenticate the user.
If the user is successfully authenticated, they will be redirected to the user’s home page using the $location service. If the authentication fails, the user is notified with an error message.
login.html
<!--login.html-->
<div class="col-md-6 col-md-offset-3">
<h4 style="text-align:center;color:blue">Login</h4>
<form name="form" ng-submit="vm.login()" role="form">
<div class="form-group" ng-class="{ 'has-error': form.username.$dirty && form.username.$error.required }">
<label for="username">Username</label>
<input type="text" name="username" id="username" class="form-control" ng-model="vm.username" required />
<span ng-show="form.username.$dirty && form.username.$error.required" class="help-block">Username is required</span>
</div>
<div class="form-group" ng-class="{ 'has-error': form.password.$dirty && form.password.$error.required }">
<label for="password">Password</label>
<input type="password" name="password" id="password" class="form-control" ng-model="vm.password" required />
<span ng-show="form.password.$dirty && form.password.$error.required" class="help-block">Password is required</span>
</div>
<div class="form-actions" layout="row">
<button type="submit" ng-disabled="form.$invalid || vm.dataLoading" class="btn btn-primary">Login</button>
<img ng-if="vm.dataLoading" src="data:image/gif;base64,R0lGODlhEAAQAPIAAP///" /> <!-- truncated line -->
<span style="float:right">Not a member?<a href="#!/register" class="btn btn-link">Register</a></span>
</div>
</form>
</div>
Now, we’ll create loginController.js file and define our login controller. Let’s create loginController.js file and put the following code in it –
//loginController.js
(function () {
'use strict';
angular
.module('app')
.controller('LoginController', LoginController);
LoginController.$inject = ['$location','AuthenticationService'];
function LoginController( $location, AuthenticationService) {
var vm = this;
vm.login = login;
(function initController() {
// reset login status
AuthenticationService.ClearCredentials();
})();
function login() {
console.log("login method executing");
vm.dataLoading = true;
AuthenticationService.Login(vm.username, vm.password, function (response) {
if (response.success) {
AuthenticationService.SetCredentials(vm.username, vm.password);
$location.path('/home');
} else {
alert(response.message);
vm.dataLoading = false;
}
});
}
}
})();
User Home
Once the user is successfully logged in, the home page (home.html) is loaded. Here we have a simple welcome message along with a list of registered users. Let’s create a home.html file at the root of your project and put the following code in it −
<!--home.html-->
<div class="col-md-6 col-md-offset-3">
<h2 style="text-align:center;color:blue">Home</h2>
<div align="right"><a href="#!/">Logout</a></div>
<h3>Hi {{vm.currentUser.firstName + " " + vm.currentUser.lastName}}</h3>
<div>Welcome.. You're logged in successfuly!!
<br/>To view all the users please click on below link.</div>
<div align="right">
<a href="" ng-click="vm.showUsers = !vm.showUsers">View Users</a>
</div>
<div ng-if="vm.showUsers">
<h4>Registered Users:</h4>
<table class = "table table-striped table-bordered table-hover">
<thead>
<tr class = "info">
<th>First Name</th>
<th>Last Name</th>
<th>Username</th>
</tr>
</thead>
<tbody>
<tr ng-repeat = "user in vm.allUsers track by $index">
<td>{{ user.firstName }}</td>
<td>{{ user.lastName }}</td>
<td>{{ user.username }}</td>
</tr>
</tbody>
</table>
</div>
</div>
Now, we’ll create homeController.js file and define our home page controller. Let’s create homeController.js file and put the following code in it.
(function () {
'use strict';
angular
.module('app')
.controller('HomeController', HomeController);
HomeController.$inject = ['UserService', '$rootScope'];
function HomeController(UserService, $rootScope) {
var vm = this;
vm.showUsers = false;
vm.currentUser = null;
vm.allUsers = [];
initController();
function initController() {
loadCurrentUser();
loadAllUsers();
}
function loadCurrentUser() {
UserService.getByUsername($rootScope.globals.currentUser.username)
.then(function (user) {
vm.currentUser = user;
});
}
function loadAllUsers() {
UserService.get()
.then(function (users) {
vm.allUsers = users;
});
}
}
})();
AngularJS services
In this step, we define an angualrjs service for user authentication and for storing and retrieving user information from local storage.
Authentication Service:-
Here we will create an authentication service (authenticationService.js) that will be used to authenticate the user using the provided credentials and set and clear user credentials from the angularjs rootScope object.
Let’s create an authenticationService.js file and put the following code in it.
//authenticationService.js
(function () {
'use strict';
angular
.module('app')
.factory('AuthenticationService', AuthenticationService);
AuthenticationService.$inject = ['$http', '$cookies', '$rootScope', '$timeout', 'UserService'];
function AuthenticationService($http, $cookies, $rootScope, $timeout, UserService) {
var service = {};
service.Login = Login;
service.SetCredentials = SetCredentials;
service.ClearCredentials = ClearCredentials;
return service;
function Login(username, password, callback) {
/* Dummy authentication for testing, uses $timeout to simulate api call
----------------------------------------------*/
$timeout(function () {
var response;
UserService.getByUsername(username)
.then(function (user) {
if (user !== null && user.password === password) {
response = { success: true };
} else {
response = { success: false, message: 'Username or password is incorrect' };
}
callback(response);
});
}, 1000);
/* Use this for real authentication
----------------------------------------------*/
//$http.post('/api/authenticate', { username: username, password: password })
//    .success(function (response) {
//        callback(response);
//    });
}
function SetCredentials(username, password) {
var authdata = Base64.encode(username + ':' + password);
$rootScope.globals = {
currentUser: {
username: username,
authdata: authdata
}
};
// set default auth header for http requests
$http.defaults.headers.common['Authorization'] = 'Basic ' + authdata;
// store user details in globals cookie that keeps user logged in for 1 week (or until they logout)
var cookieExp = new Date();
cookieExp.setDate(cookieExp.getDate() + 7);
$cookies.putObject('globals', $rootScope.globals, { expires: cookieExp });
}
function ClearCredentials() {
$rootScope.globals = {};
$cookies.remove('globals');
$http.defaults.headers.common.Authorization = 'Basic';
}
}
// Base64 encoding service used by AuthenticationService
var Base64 = {
keyStr: 'ABCDEFGHIJKLMNOPQRSTUVWXYZabcdefghijklmnopqrstuvwxyz0123456789+/=',
encode: function (input) {
var output = "";
var chr1, chr2, chr3 = "";
var enc1, enc2, enc3, enc4 = "";
var i = 0;
do {
chr1 = input.charCodeAt(i++);
chr2 = input.charCodeAt(i++);
chr3 = input.charCodeAt(i++);
enc1 = chr1 >> 2;
enc2 = ((chr1 & 3) << 4) | (chr2 >> 4);
enc3 = ((chr2 & 15) << 2) | (chr3 >> 6);
enc4 = chr3 & 63;
if (isNaN(chr2)) {
enc3 = enc4 = 64;
} else if (isNaN(chr3)) {
enc4 = 64;
}
output = output +
this.keyStr.charAt(enc1) +
this.keyStr.charAt(enc2) +
this.keyStr.charAt(enc3) +
this.keyStr.charAt(enc4);
chr1 = chr2 = chr3 = "";
enc1 = enc2 = enc3 = enc4 = "";
} while (i < input.length);
return output;
},
decode: function (input) {
var output = "";
var chr1, chr2, chr3 = "";
var enc1, enc2, enc3, enc4 = "";
var i = 0;
// remove all characters that are not A-Z, a-z, 0-9, +, /, or =
var base64test = /[^A-Za-z0-9\+\/\=]/g;
if (base64test.exec(input)) {
window.alert("There were invalid base64 characters in the input text.\n" +
"Valid base64 characters are A-Z, a-z, 0-9, '+', '/',and '='\n" +
"Expect errors in decoding.");
}
input = input.replace(/[^A-Za-z0-9\+\/\=]/g, "");
do {
enc1 = this.keyStr.indexOf(input.charAt(i++));
enc2 = this.keyStr.indexOf(input.charAt(i++));
enc3 = this.keyStr.indexOf(input.charAt(i++));
enc4 = this.keyStr.indexOf(input.charAt(i++));
chr1 = (enc1 << 2) | (enc2 >> 4);
chr2 = ((enc2 & 15) << 4) | (enc3 >> 2);
chr3 = ((enc3 & 3) << 6) | enc4;
output = output + String.fromCharCode(chr1);
if (enc3 != 64) {
output = output + String.fromCharCode(chr2);
}
if (enc4 != 64) {
output = output + String.fromCharCode(chr3);
}
chr1 = chr2 = chr3 = "";
enc1 = enc2 = enc3 = enc4 = "";
} while (i < input.length);
return output;
}
};
})();
User Service:-
Next, we’ll create a user service (userService.svc.js) to store and retrieve user details from the localStorage object. Let’s create a userService.svc.js file and put the following code in it −
//userService.svc.js
(function () {
'use strict';
angular.module("app")
.service("UserService" , UserService);
UserService.$inject = ['$timeout', '$filter', '$q'];
function UserService($timeout, $filter, $q){
var service = {};
service.get = get;
service.getByUsername = getByUsername;
service.create = create;
return service;
function get(){
var deferred = $q.defer();
deferred.resolve(getUsers());
return deferred.promise;
}
function getByUsername(username) {
var deferred = $q.defer();
var filtered = $filter('filter')(getUsers(), { username: username });
var user = filtered.length ? filtered[0] : null;
deferred.resolve(user);
return deferred.promise;
}
function create(user){
var deferred = $q.defer();
// simulate api call with $timeout
$timeout(function () {
getByUsername(user.username)
.then(function (duplicateUser) {
if (duplicateUser !== null) {
deferred.resolve({ success: false, message: 'Username "' + user.username + '" is already exists' });
} else {
var users = getUsers();
// assign id
var lastUser = users[users.length - 1] || { id: 0 };
user.id = lastUser.id + 1;
// save to local storage
users.push(user);
createUser(users);
deferred.resolve({ success: true });
}
});
}, 1000);
return deferred.promise;
}
function getUsers(){
if(!localStorage.users){
localStorage.users = JSON.stringify([]);
}
return JSON.parse(localStorage.users);
}
function createUser(users){
localStorage.users = JSON.stringify(users);
}
}
})();
Finally, we will have css(style.css) file that will hold all the styling rules for our application/ Let’s create a style.css file and put the following code in it –
.header{
text-align:center;
color:black;
font-weight:bold;
font-size:16px;
margin:0 0 25px 0;
}
Run AngularJS Application
Start the application server and view the application to view the output.
Registration page:-
Login Page:-