In this article, we will learn how to create a dropdown in React JS along with How to get the selected value from the dropdown.
React Js is a library of Javascript which is built to create an interactive UI. While creating an interface, we often come across dropdown elements. And, as a beginner, we often tend to get confused about how to fetch the selected value from the options. So, here I will discuss three ways in which we can get the selected value or we can populate values in dropdowns in React JS.
- By using a simple HTML options tag.
- By using the map method
- By using the reusable components.
Before going further, let us create a react app using the react CLI. Follow these steps to create a new react app.
- Open Cmd prompt > Go to the folder where you want to create a project with the help of command prompt codes > enter the command npx create-react-app practice-react-app.
D:\Job Stuff\My_Study\React JS>npx create-react-app practice-react-app
- After this, install the bootstrap using npm i –save bootstrap. (Make sure to import
import ‘bootstrap/dist/css/bootstrap.min.css’ in the index.js file)
D:\Job Stuff\My_Study\React JS\practice-react-app>npm i --save bootstrap
Now, we will create a component called ProductComponent inside the src/components folder. Here, I am using the functional component to create the component.
productcomponent.jsx
import React, { useState } from 'react'
const ProductComponent = () => {
    const [product,setProduct] = useState({productId:0,productName:'',productCategory:'',productPrice:0});

    const save = () => {
        // This would be call on onClick of Save button
        console.log(`Values from product is: `);
        console.log(`ProductId: ${product.productId} ProductName: ${product.productName} Product Category: ${product.productCategory} ProductPrice: ${product.productPrice}`);
    }
  return (
    <div className='container'>
        <h1 className='text-center'>Product Form</h1>
       <div className='form-group'>
            <label htmlFor="">ProductId</label>
            <input type="text" className='form-control' value={product.productId} onChange={(evt)=>setProduct({...product,productId:parseInt(evt.target.value)})} />
       </div>
       <div className='form-group'>
            <label htmlFor="">Product Name</label>
            <input type="text" className='form-control' value={product.productName} onChange={(evt)=>setProduct({...product,productName:evt.target.value})} />
       </div>
       <div className='form-group'>
            <label htmlFor="">Product Category</label>
              <select className='form-select' value={product.productCategory} onChange={(evt)=>setProduct({...product,productCategory:evt.target.value})}>
                 <option value={Books}>Books</option>
                <option value={Furniture}>Furniture</option>
                <option value={Electronics}>Electronics</option>
                <option value={Mobile}>Mobile</option>
             </select>
       </div>
       <div className='form-group'>
            <label htmlFor="">Product Price</label>
            <input type="text" className='form-control' value={product.productPrice} onChange={(evt)=>setProduct({...product,productPrice:evt.target.value})} />
       </div>
       <div className='form-group mt-2 text-center'>
            <input type="button" value="Save" className='btn btn-success mr-3' onClick={save}/>
            <input type="button" value="Clear" className='btn btn-warning'/>
       </div>

       <div className='container'>
          <h4>Product Info:</h4> {
             JSON.stringify(product)
           }
       </div>
       <div className='container mt-3'>
          <h4>Product Category:</h4> {
             product.productCategory
           }
       </div>
    </div>
  )
}

export default ProductComponent
In the above code, we have created the product which has productId,productName,productCategory, and productPrice.
useState hook is used to keep the track of state in our ProductComponent. Here, for displaying productCategory we have used the <select></select> tag. In this example, we have used the normal HTML way to display values using the options tag.
Using HTML options Tags
<select className='form-select' value={product.productCategory} onChange={(evt)=>setProduct({...product,productCategory:evt.target.value})}>
 <option value={Books}>Books</option>
 <option value={Furniture}>Furniture</option>
 <option value={Electronics}>Electronics</option>
 <option value={Mobile}>Mobile</option>
</select>
onChange() method is called for every JSX element and it will update the state of the product.
Now, let us render this component and go to index.js and add this component in the following way:
<React.StrictMode>
   <ProductComponent/>
</React.StrictMode>
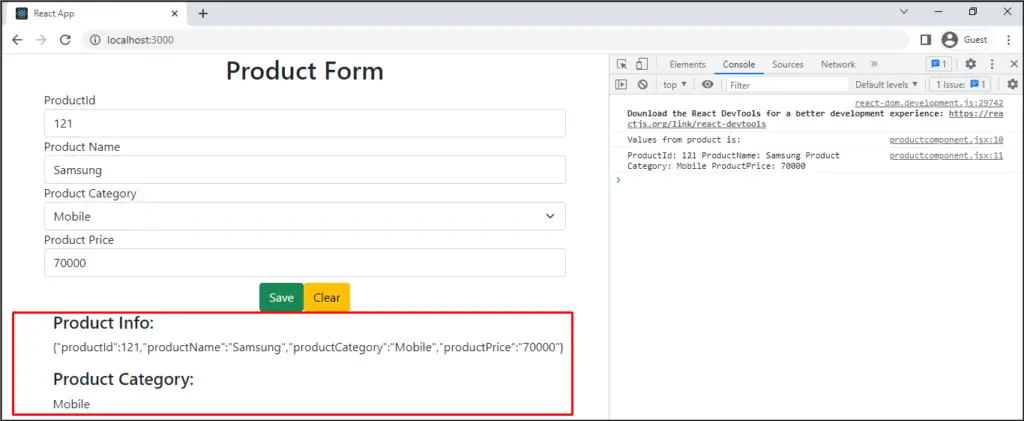
Run the application using the npm run start command and see the following output. First, look at how the dropdown values are populated

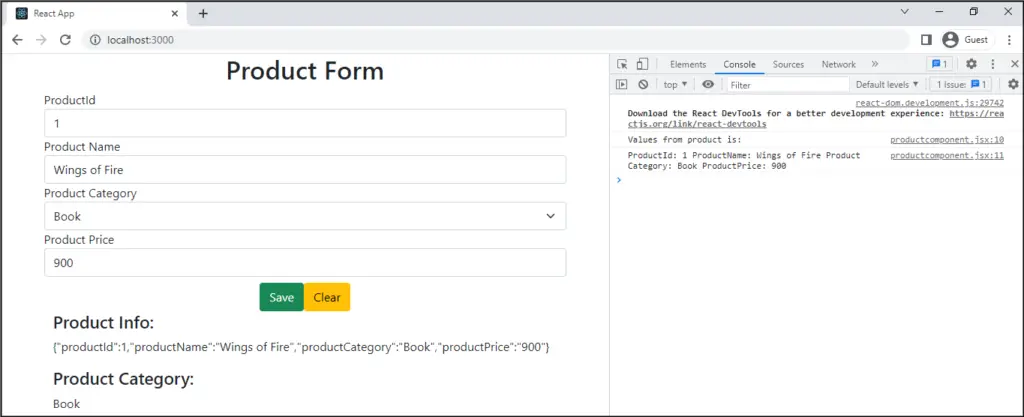
Now, after clicking let us see the output that shows all the selected elements.

Thus, this is the first way where we have used the simple HTML options tag to show all the elements. But if we want to add one more element then we would need to change the UI and add one more option. This is not a better approach. Let us see the next approach i.e by using the map method.
By Using the map method
In this approach, we will create a categories array with all the categories. Then, use the map() method to iterate over this array and show all the values in the dropdown.
import React, { useState } from 'react'
//import reusable select component
import SelectComponent from '../resuablecomponent/selectcomponent';
const ProductComponent = () => {
    const [product,setProduct] = useState({productId:0,productName:'',productCategory:'',productPrice:0});
    const categories = ['Book','Mobile','Electrical','Furniture','Cloth','Home Decor'];

    const save = () => {
        // This would be call on onClick of Save button
        console.log(`Values from product is: `);
        console.log(`ProductId: ${product.productId} ProductName: ${product.productName} Product Category: ${product.productCategory} ProductPrice: ${product.productPrice}`);
    }
  return (
    <div className='container'>
        <h1 className='text-center'>Product Form</h1>
       <div className='form-group'>
            <label htmlFor="">ProductId</label>
            <input type="text" className='form-control' value={product.productId} onChange={(evt)=>setProduct({...product,productId:parseInt(evt.target.value)})} />
       </div>
       <div className='form-group'>
            <label htmlFor="">Product Name</label>
            <input type="text" className='form-control' value={product.productName} onChange={(evt)=>setProduct({...product,productName:evt.target.value})} />
       </div>
       <div className='form-group'>
            <label htmlFor="">Product Category</label>
             <select className='form-select' value={product.productCategory} onChange={(evt)=>setProduct({...product,productCategory:evt.target.value})}>
                {
                    categories.map((cat,idx)=>(
                        <option key={idx} value={cat}>{cat}</option>
                    ))
                }
          </select>
       </div>
       <div className='form-group'>
            <label htmlFor="">Product Price</label>
            <input type="text" className='form-control' value={product.productPrice} onChange={(evt)=>setProduct({...product,productPrice:evt.target.value})} />
       </div>
       <div className='form-group mt-2 text-center'>
            <input type="button" value="Save" className='btn btn-success mr-3' onClick={save}/>
            <input type="button" value="Clear" className='btn btn-warning'/>
       </div>

       <div className='container'>
          <h4>Product Info:</h4> {
             JSON.stringify(product)
           }
       </div>
       <div className='container mt-3'>
          <h4>Product Category:</h4> {
             product.productCategory
           }
       </div>
    </div>
  )
}

export default ProductComponent
Here, you can see, that I have created a category array and inside the return method iterated over it to get all the values in the dropdown.
<select className='form-select' value={product.productCategory} onChange={(evt)=>setProduct({...product,productCategory:evt.target.value})}>
 {
  categories.map((cat,idx)=>(
<option key={idx} value={cat}>{cat}</option>
   ))
 }
</select>
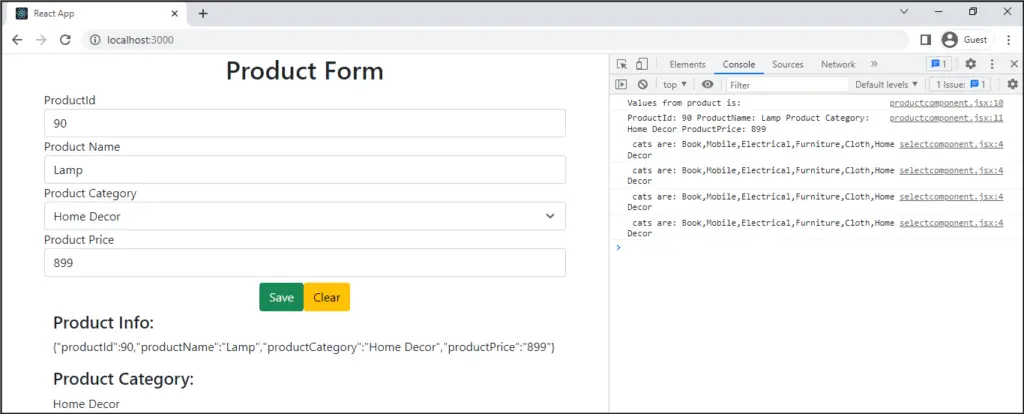
Thus, run it and you can see all the values will get populated and we will get the selected value from the dropdown

Thus, this is the second way where we can get all the values in the dropdown using the map() method. This is a good approach but here we can have one more way that we will discuss below by creating reusable components.
By creating a reusable component
In this approach, we will create a new component called SelectComponent and we will use it dynamically inside a ProductComponent by having a Parent-Child relationship. Create a ProductComponent as shown below and SelectComponent inside the src/reusablecomponents folder.
Folder Structure:

productcomponent.jsx
import React, { useState } from 'react'
//import reusable select component
import SelectComponent from '../resuablecomponent/selectcomponent';
const ProductComponent = () => {
    const [product,setProduct] = useState({productId:0,productName:'',productCategory:'',productPrice:0});
    const categories = ['Book','Mobile','Electrical','Furniture','Cloth','Home Decor'];

    const save = () => {
        // This would be call on onClick of Save button
        console.log(`Values from product is: `);
        console.log(`ProductId: ${product.productId} ProductName: ${product.productName} Product Category: ${product.productCategory} ProductPrice: ${product.productPrice}`);
    }
  return (
    <div className='container'>
        <h1 className='text-center'>Product Form</h1>
       <div className='form-group'>
            <label htmlFor="">ProductId</label>
            <input type="text" className='form-control' value={product.productId} onChange={(evt)=>setProduct({...product,productId:parseInt(evt.target.value)})} />
       </div>
       <div className='form-group'>
            <label htmlFor="">Product Name</label>
            <input type="text" className='form-control' value={product.productName} onChange={(evt)=>setProduct({...product,productName:evt.target.value})} />
       </div>
       <div className='form-group'>
            <label htmlFor="">Product Category</label>
            <SelectComponent cat={categories}  getValue={(val)=>{setProduct({...product,productCategory:val})}}></SelectComponent>
       </div>
       <div className='form-group'>
            <label htmlFor="">Product Price</label>
            <input type="text" className='form-control' value={product.productPrice} onChange={(evt)=>setProduct({...product,productPrice:evt.target.value})} />
       </div>
       <div className='form-group mt-2 text-center'>
            <input type="button" value="Save" className='btn btn-success mr-3' onClick={save}/>
            <input type="button" value="Clear" className='btn btn-warning'/>
       </div>

       <div className='container'>
          <h4>Product Info:</h4> {
             JSON.stringify(product)
           }
       </div>
       <div className='container mt-3'>
          <h4>Product Category:</h4> {
             product.productCategory
           }
       </div>
    </div>
  )
}

export default ProductComponent
selectcomponent.jsx
import React from 'react'

const SelectComponent = (props) => {
    console.log(` cats are: ${props.cat}`);
    const handleChange = (event) => {
      // We will pass the selected value to prop's object getValue() method
      props.getValue(
          event.target.value
          );
    }
  return (
    <select className='form-select' onChange={handleChange}  >
        {props.cat.map((c,idx)=>(
            <option key={idx} value={c}>{c}</option>
        ))}
    </select>
  )
}

export default SelectComponent
Here, we are passing the categories as props to SelectComponent. Inside this component, we are fetching it using props.cat. Now, to emit the changes or to show the selected value we have called handleChange() method on onChange. Inside the handleChange() method we will pass the selected value to props object getValue() method. And at last in the parent component, we will fetch it inside getValue().
Following is the diagrammatical representation of the communication between the components.

Thus, once again run the application and you will get all the values getting populated to the dropdown and you will be able to get the selected value from the dropdown.

Thus, this is one of the best approaches where we can utilize the benefits of React library because React is used to create reusable components.
Hence, this was all about How to populate the dropdown with values in React JS along with How to get the selected value.
