Create login and registration in Django to access service’s customization, users should have personal accounts so that they can perform actions related only to them: for example, save personal preferences, post articles, or make purchases.
If you are an active Internet user, you’re probably familiar with the sign-up, login, and logout operations. Django provides the means to add those operations easily. In this topic, you will learn how to add registration and authentication to a service.
Start a project
Create a project named login and then create an app named accounts
django-admin startproject login

cd login

python manage.py startapp accounts
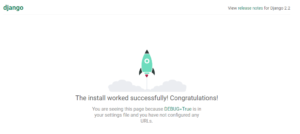
Now, start the server using the command
python manage.py runserver
And you should get like this
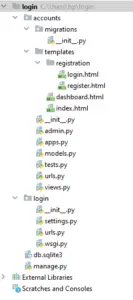
Create your project according to the following tree:
User Model
To distinguish one user from another, we need to store their identification information on the server. On websites, it’s usually a unique username or email address. Both characteristics may be stored in the default User model.
To start working with the User model, run python manage.py migrate from the root of your project. If you don’t change any settings, you will have an SQLite database attached to your project.
After you’ve made initial migrations you can create new accounts. Mostly, the clients of your service will create accounts by themselves, but let’s see how you can create a usual user and a superuser in the database from the console.
Superuser is an admin account for your service. Being a superuser you can access and manipulate any data in the database. Usual users, by contrast, can manipulate only their own data.
To use an initialized console client, run python manage.py shell command.
python manage.py createsuperuser
Then fill the required details.
Preparing URLs
To separate each action, we should choose the URL addresses for login, logout, and signup operations. You should update the urlpatterns variable in your main urls.py module.
To make it neat and clear, we choose straightforward paths in login\urls.py
urlpatterns = [
    path('admin/', admin.site.urls),
    path('accounts/',include('accounts.urls')),
]
Also make changes in accounts\urls.py
from django.urls import path
from . import views
from django.contrib.auth.views import LoginView,LogoutView
urlpatterns = [
    path('',views.indexView,name="home"),
    path('dashboard/',views.dashboardView,name="dashboard"),
    path('login/',LoginView.as_view(),name="login_url"),
    path('register/',views.registerView,name="register_url"),
    path('logout/',LogoutView.as_view(next_page='dashboard'),name="logout"),
]
Views
You already know how you can create a new user with Python, but regular users don’t know Python. We’ve got to provide a simple web interface for them with an HTML form. Fortunately, making it will only take us a few simple steps, and then our new users will just sign up on their own.
Now, we should now frame our views.py
from django.shortcuts import render, redirect
from django.contrib.auth.forms import UserCreationForm
from django.contrib.auth.decorators import login_required
# Create your views here.
def indexView(request):
    return render(request,'index.html')
@login_required()

def dashboardView(request):
    return render(request,'dashboard.html')

def registerView(request):
    if request.method == "POST":
        form = UserCreationForm(request.POST)
        if form.is_valid():
            form.save()
            return redirect('login_url')
    else:
        form = UserCreationForm()
    return render(request,'registration/register.html',{'form':form})
Also make changes in your settings.py. Do not forget to add ‘accounts’ app in the settings and also add the LOGIN_REDIRECT_URL at last as follows:
INSTALLED_APPS = [
    'django.contrib.admin',
    'django.contrib.auth',
    'django.contrib.contenttypes',
    'django.contrib.sessions',
    'django.contrib.messages',
    'django.contrib.staticfiles',
    'accounts',
]


#add the following at last of settings.py

LOGIN_REDIRECT_URL = '/accounts/dashboard/'
To define where the user should be redirected after successful authentication, we set LOGIN_REDIRECT_URL = ‘/’ in the settings.py module. It’s usually the main page of the service, but you can choose any page you like.
Templates
The process of creating a request handler for logging in is very similar to making a registration form. We define the class and specify the template_name in it:
This time we add another attribute redirect_authenticated_user and set it to True. All authenticated users that come back to the login page will be redirected to the main site instead of having to fill the authentication form again.
To define where the user should be redirected after successful authentication, we set LOGIN_REDIRECT_URL = ‘/’ in the settings.py module. It’s usually the main page of the service, but you can choose any page you like.
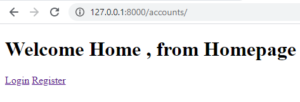
Now, let us define the index.html
<!DOCTYPE html>
<html>
<head>
    <title>Simple Auth System</title>
</head>
<body>
    {% block content %}
        <h1>Welcome Home , from Homepage </h1>
        {% if user.is_authenticated %}
             <a href="{% url 'logout' %}">Logout</a>

        {% else %}
            <a href="{% url 'login_url' %}">Login</a>
            <a href="{% url 'register_url' %}">Register</a>

        {% endif %}

    {% endblock %}
</body>
</html>
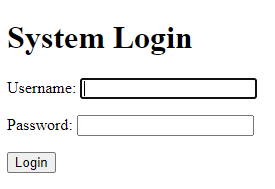
The login.html template differs from index.html by the action field and the label of the button:
{% extends 'index.html' %}

{% block content %}
    <h1>System Login</h1>
    <form method="POST">
         {% csrf_token %}
        {{form.as_p}}
        <button>Login</button>
    </form>
{% endblock %}
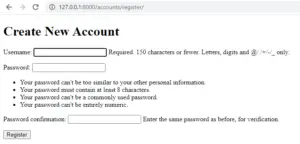
Let us define the register.html
{% extends 'index.html' %}

{% block content %}
    <h1>Create New Account</h1>
    <form method="POST">
         {% csrf_token %}
        {{form.as_p}}
        <button>Register</button>
    </form>
{% endblock %}
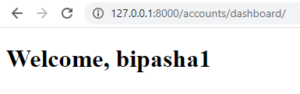
Finally, let us define dashboard.html
{% extends 'index.html' %}

{% block content %}
    <h1>Welcome, {{user.username}}</h1>

{% endblock %}
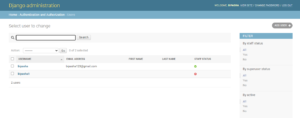
On checking the django admin page we should get like this
On running the server/dashboard we will get the output like this:
And the main page, that is, server/accounts will look like this:
Logout
The last action our users need is logout. They do not need to send any information, so to log out they should just go to the right URL.
In urlpatterns you can find that for logout we use LogoutView class from django.contrib.auth.views module. Just import it to the urls.py module to complete the work.
If you want to specify where the user should be redirected after logging out, you can define this in the settings.py module. For example, to redirect users back to the login page, add this line to the module: LOGOUT_REDIRECT_URL = ‘/login’.
On entering the correct credentials you will be redirected to the next page like this:
And finally when you frame your logout button it will look like this:
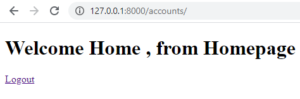
On logging out you will again be redirected to the System Login Page.
Now you know enough to add authentication to any service, so you can get your hands on personalizing your web service for each individual user