In the previous article, we have seen How to create a project using Spring Initializr you can check it here. In this article, we will see another approach to create a Spring Boot project by using the IDE STS.
Spring Tool Suite provides the IDE(Integrated Development Environment) for developing world-class Enterprise applications. If you want to know How to configure STS on your machine you can check here.
How to create Spring Boot Project in STS?
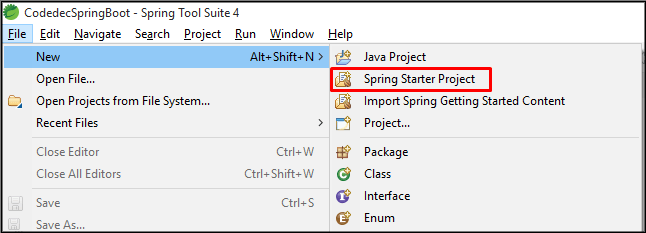
Step 1: Open IDE STS- Spring Tool Suite
Step 2: Go to File > Spring Starter Project.
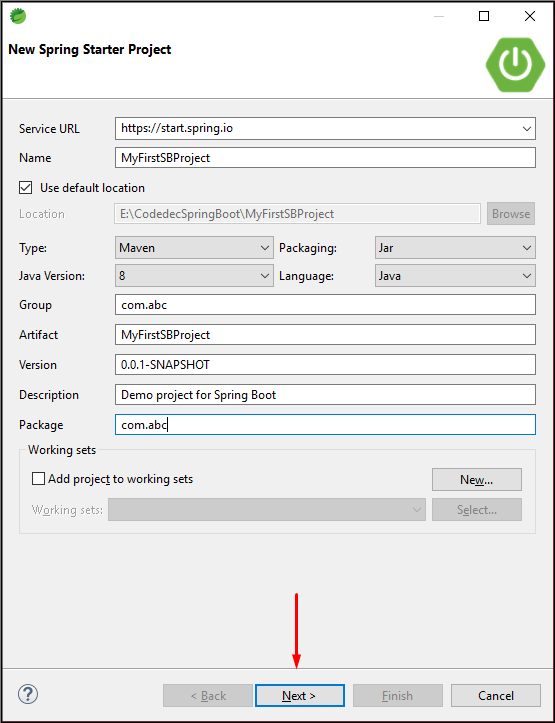
Step 3: Now, Fill all the fields as shown below and click Next.
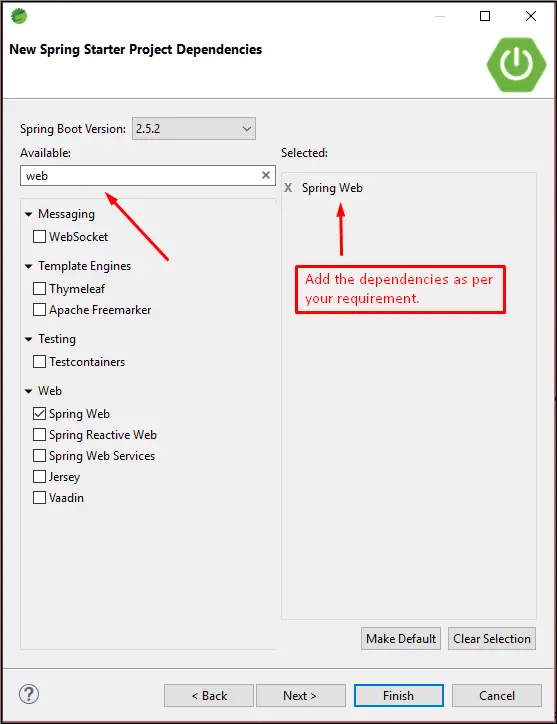
Step 4: Now, Add the dependencies as per your requirement, I have added Spring Web Dependency and click Next > Finish.
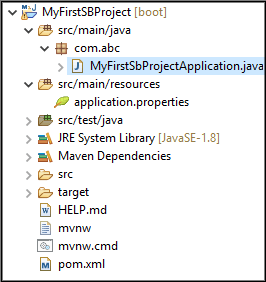
Step 4: Now, It will take time to load the projects and the dependencies and your Project Structure will look like this.
Step 5: Go to the pom.xml file, Here, we can see all the dependencies are added automatically. Following are the important dependencies.
- It is the spring-boot-starter-parent dependencies to make the project as spring boot.
<dependency>
    <groupId>org.springframework.boot</groupId>
    <artifactId>spring-boot-starter</artifactId>
</dependency>
- This is the spring-boot-starter-web dependency to use the web support.
<dependency>
    <groupId>org.springframework.boot</groupId>
    <artifactId>spring-boot-starter-web</artifactId>
</dependency>
Step 6: Go to MyFirstSbProjectApplication.java, In this, we can see the following method run().
package com.abc;

import org.springframework.boot.SpringApplication;
import org.springframework.boot.autoconfigure.SpringBootApplication;

@SpringBootApplication
public class MyFirstSbProjectApplication {

  public static void main(String[] args) {
    SpringApplication.run(MyFirstSbProjectApplication.class, args);
  }

}
From here, the Spring Boot application starts. This class is annotated with @SpringBootApplication which single-handedly enables these 3 annotations.
- @Configuration: It registers extra beans in the context as well as imports additional configuration classes.
- @ComponentScan: t scans the package where the application is located.
- @EnableAutoConfiguration: It enables the Spring Boot auto-configuration mechanism.
Step 7: Run this file MyFirstSbProjectApplication.java as Java Application. It will show the following messages in the console. 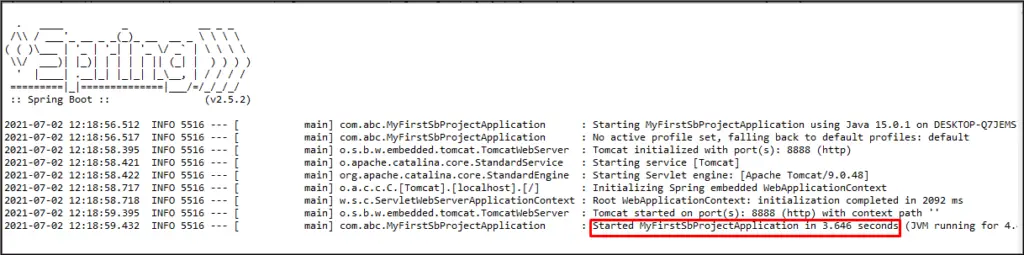
The line Started MyFirstSbProjectApplication in 3.646 seconds in the console shows that the application is up and running successfully.
Thus, in this way, we create a project using STS (Spring Tool Suite).