In this article, we will understand the use of @RequestParam annotation in Spring MVC with a simple example.
While working with Servlets, when we want to fetch the form data; we used the object of HttpServletRequest to get the data from the form and used the getParameter() method. Unlike this, Spring MVC provides us the annotation to extract form data i.e @RequestParam Annotation.
What is @RequestParam Annotation?
@RequestParam Annotation is used to get the form data and binds the data to the parameters.
- It also extracts query parameters from the URL.
- It also extracts files from the request.
- It extracts form parameters.
Let us look at a simple example to use the @RequestParam Annotation
Example of @RequestParam in Spring MVC
.Create a Spring Project Go to File> New > Other > Search maven > Select Maven Project > Next > Search Filter org.apche.maven.archetypes/webapp > Next > Enter Group Id & Archetype id > Finish.
Now, Create a pom.xml file to add all the dependencies needed for Spring MVC Configuration
<project xmlns="http://maven.apache.org/POM/4.0.0"
  xmlns:xsi="http://www.w3.org/2001/XMLSchema-instance"
  xsi:schemaLocation="http://maven.apache.org/POM/4.0.0 http://maven.apache.org/maven-v4_0_0.xsd">
  <modelVersion>4.0.0</modelVersion>
  <groupId>co</groupId>
  <artifactId>SpringMVCExample</artifactId>
  <packaging>war</packaging>
  <version>0.0.1-SNAPSHOT</version>
  <name>SpringMVCExample Maven Webapp</name>
  <url>http://maven.apache.org</url>
  <dependencies>
    <dependency>
      <groupId>junit</groupId>
      <artifactId>junit</artifactId>
      <version>3.8.1</version>
      <scope>test</scope>
    </dependency>
    <!-- https://mvnrepository.com/artifact/org.springframework/spring-context -->
    <dependency>
      <groupId>org.springframework</groupId>
      <artifactId>spring-context</artifactId>
      <version>5.3.5</version>
    </dependency>
    <!-- https://mvnrepository.com/artifact/org.springframework/spring-web -->
    <dependency>
      <groupId>org.springframework</groupId>
      <artifactId>spring-web</artifactId>
      <version>5.3.5</version>
    </dependency>
    <!-- https://mvnrepository.com/artifact/org.springframework/spring-core -->
    <dependency>
      <groupId>org.springframework</groupId>
      <artifactId>spring-core</artifactId>
      <version>5.3.5</version>
    </dependency>
    <!-- https://mvnrepository.com/artifact/org.springframework/spring-beans -->
    <dependency>
      <groupId>org.springframework</groupId>
      <artifactId>spring-beans</artifactId>
      <version>5.3.5</version>
    </dependency>
    <!-- https://mvnrepository.com/artifact/javax.servlet/jstl -->
    <dependency>
      <groupId>javax.servlet</groupId>
      <artifactId>jstl</artifactId>
      <version>1.2</version>
    </dependency>

    <!-- https://mvnrepository.com/artifact/javax.servlet.jsp/javax.servlet.jsp-api -->
    <dependency>
      <groupId>javax.servlet.jsp</groupId>
      <artifactId>javax.servlet.jsp-api</artifactId>
      <version>2.3.3</version>
      <scope>provided</scope>
    </dependency>
    <!-- https://mvnrepository.com/artifact/javax.servlet/javax.servlet-api -->
    <dependency>
      <groupId>javax.servlet</groupId>
      <artifactId>javax.servlet-api</artifactId>
      <version>4.0.1</version>
      <scope>provided</scope>
    </dependency>
    <!-- https://mvnrepository.com/artifact/org.springframework/spring-webmvc -->
    <dependency>
      <groupId>org.springframework</groupId>
      <artifactId>spring-webmvc</artifactId>
      <version>5.3.5</version>
    </dependency>
  </dependencies>
  <build>
    <finalName>SpringMVCExample</finalName>
  </build>
</project>
Create a Spring-servlet.xml file. As we are building a Spring MVC application so we will need to store spring-related information in a file. So, it provides a file called [anyName]-servlet.xml. It contains information on configuration.
- Here, we have used <context:component-scan> detects the annotation by package scanning.
- It tells Spring to scan which package to search for Controller, Beans, or any component.
- @Component, @Controller, @Repository, @Service, @Service, and etc. are ones that <context:component-scan> can detect.
- To resolves views such as JSP, we have used InternalResourceViewResolver.
<?xml version="1.0" encoding="UTF-8"?>
<beans xmlns="http://www.springframework.org/schema/beans"
   xmlns:context="http://www.springframework.org/schema/context"
   xmlns:xsi="http://www.w3.org/2001/XMLSchema-instance"
   xsi:schemaLocation="
   http://www.springframework.org/schema/beans
   http://www.springframework.org/schema/beans/spring-beans.xsd
   http://www.springframework.org/schema/context
   http://www.springframework.org/schema/context/spring-context.xsd">

   <!--  component scan -->
   <context:component-scan base-package="org.mvc.controller"></context:component-scan>


  <bean class="org.springframework.web.servlet.view.InternalResourceViewResolver">
  <property name="prefix" value="/WEB-INF/views/" />
      <property name="suffix" value=".jsp" />
  </bean>
   </beans>
Now, Create a Controller. The DispatcherServlet on receiving the request transfer the request to the controller.
- The @Controller here defines the class as Controller in SpringMVC.
- The @RequestMapping is used to map the URL. Here, it is ‘/’ means all the requests for this will be handled by this home() method.
- Here, we have returned the “index” Page.
- Create another method add to map /add.
package org.mvc.controller;

import org.springframework.stereotype.Controller;
import org.springframework.ui.Model;
import org.springframework.web.bind.annotation.RequestMapping;
import org.springframework.web.bind.annotation.RequestParam;

@Controller
public class HomeController {

  @RequestMapping("/")
  public String home(Model m) {

    return "index";
  }

  @RequestMapping("/add")
  public String add(@RequestParam("num1") int number1, @RequestParam("num2") int number2, Model m) {

    int answer =number1 + number2;
    m.addAttribute("answer",answer);
    return "result";

  }
}
Here, On-Line no:18, we have used @RequestParam and passed the name parameter of the form.
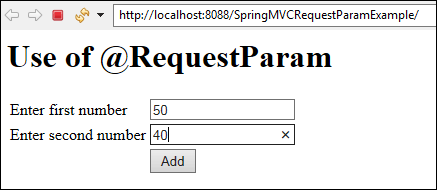
Create an index.jsp page to show the form with two fields
<%@ taglib prefix="c" uri="http://java.sun.com/jstl/core" %>
<%@ taglib prefix="x" uri="http://java.sun.com/jstl/xml" %>
<%@ taglib prefix="fmt" uri="http://java.sun.com/jstl/fmt" %>
<%@ taglib prefix="sql" uri="http://java.sun.com/jstl/sql" %>
<html>
<head>
<title>Spring MVC</title>
</head>
<body>
<h1>Use of  @RequestParam </h1>
<form action="add">
<table>
<tr>
<td>Enter first number</td><td><input type="text" name="num1"></td></tr>
<tr><td>Enter second number</td><td><input type="text" name="num2"></td>
<tr><td></td><td><input type="submit"  value="Add"></td>
</tr>
</table>
</form>
</body>
</html>
Create the result.jsp page to display result
<%@ page language="java" contentType="text/html; charset=ISO-8859-1"
    pageEncoding="ISO-8859-1"%>
    <%@ taglib prefix="c" uri="http://java.sun.com/jstl/core" %>
<%@ taglib prefix="x" uri="http://java.sun.com/jstl/xml" %>
<%@ taglib prefix="fmt" uri="http://java.sun.com/jstl/fmt" %>
<%@ taglib prefix="sql" uri="http://java.sun.com/jstl/sql" %>
<!DOCTYPE html>
<html>
<head>
<meta charset="ISO-8859-1">
<title>Insert title here</title>
</head>
<body>
<h2>Addition is <c:out value="${answer}"></c:out></h2>
</body>
</html>
Now, Deploy your application over the server and see the following output.

Thus, In this way, we use @RequestParam annotation to get the form data and bind it to parameters.
