In the previous article, we learn how to compare arrays using JUnit Automation Test How to Compare Arrays in JUnit Automation Test. In this article, we will learn how to do testing of Exception in JUnit.
Test Exceptions using JUnit
In Java, Exceptions are an abnormal condition that arises in the program that abrupts the flow of your code. For example, while we do some computation like consider a number 20 that is divided by 0. It’s obvious that while running it, the compiler will throw an exception called DivideByZeroException.
So, to make sure that our program throws a proper Exception we will be creating a test case for the same by using JUnit Automation Test. Here, we need to use the @Test(expected) where expected is an optional attribute to test an exception.
So, let us take a deep dive into it and with the help of an example create a test case for testing exceptions in JUnit.
Write Unit Test to test Exception in JUnit Test
We will understand the testing of exceptions using an example. In this example, we will create an array of strings. It is initialized with null values. And, we will try to sort them using the Arrays.sort() method.
Step 1: Open Eclipse > File > New > Maven Project.
Step 2: Now, you will get a New Maven Project. Check the create a simple project. Click on Next.
Step 3: Now, Enter group id, artifact id as shown below
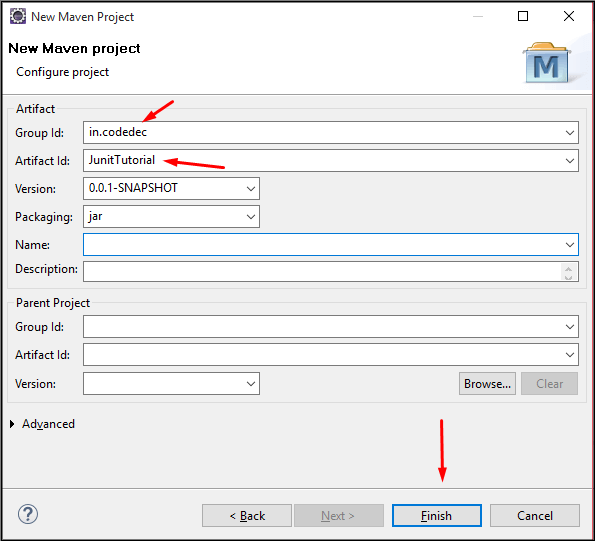
Step 4: First, create our JUnit Test case. Here, we will keep our test file in a separate package. Mostly, we keep the test case file inside src/test/java. After that, click Finish. After Finish you will get the alert box, just click OK.

Step 5: Now, we will get the default test case generated and we will modify the code as shown below
package in.codedec.junit.util;

import java.util.Arrays;

import org.junit.Test;

public class ExceptionTest {

    @Test
    public void test() {
        String name[] = null;
        Arrays.sort(name);
    }

}
- On-line no:11, an array of strings is created which is initialized with null.
- On-line no:12, Use Arrays.sort() to sort them in ascending order. Here, we know that the test would throw an exception which results in the failure of our test case.
Step 6: Now, Run the Application as JUnit Test and see the following stack trace.

Step 7: Let us now test the exception using @Test() with the expected attribute. The exception which is thrown inside the test case is handled by the @Test(expected = NullPointerException.class) annotation.
package in.codedec.junit.util;

import java.util.Arrays;

import org.junit.Test;

public class ExceptionTest {

    @Test(expected = NullPointerException.class)
    public void test() {
        String name[] = null;
        Arrays.sort(name);
    }

}
Now, once again Run the Application as JUnit Test and see the following stack trace. Here, we can see the green bar that implies the test is run successfully.

Thus, in this way, we learn how to create the test cases to test for exceptions in JUnit.
