In this blog, wwe will see how to upload image into database using AngularJS, ExpressJs, and Mongoose.
Firstly, we will create an interface in AngularJS for image uploading and when the user uploads any image and clicks on submit button the image should be stored in the database.
To create an image uploading interface we will use AngularJS, HTML, CSS, and MongoDB to store the image and ExpressJS to handle the request and response.
Upload image in MongoDB using angularJS
Step 1 – Create a Node Express js application
To build a node js application, run the following command in the terminal:
mkdir my-app
cd my-app
npm init -y
Step 2 – Install Express ejs body-parser mongoose Multer Modules.
Execute the following command in the terminal to express the ejs body-parser mongoose dependencies:
xnpm install -g express-generator
npx express --view=ejs

npm install

npm install body-parser --save
npm install express multer --save
npm install mongoose
body-parser- Node.js request body parsing middleware that parses the incoming request body before your handlers and exposes it under the req. body property. In other words, it simplifies incoming requests.
Express-EJS – EJS is a simple templating language used to generate HTML markup using plain JavaScript. Embedding JavaScript in HTML pages also helps
Mongoose – Mongoose is a MongoDB object modeler designed to work in an asynchronous environment. Mongoose supports both promises and callbacks.
Step 3 – Connect the application to MongoDB
Create a database.js file in the application root and add the following code to it to connect the application to the MongoDB database
var mongoose = require('mongoose');
mongoose.connect('mongodb://localhost:27017/node-file-upl', {useNewUrlParser: true});
var conn = mongoose.connection;
conn.on('connected', function() {
    console.log('database is connected successfully');
});
conn.on('disconnected',function(){
    console.log('database is disconnected successfully');
})
conn.on('error', console.error.bind(console, 'connection error:'));
module.exports = conn;
Step 4 – Create the model
Create a Models directory and inside that directory create an imageModel.js file; Then add the following code to it:
const mongoose = require("../database");

var mongoose = require('mongoose');

var imageSchema = new mongoose.Schema({
    name: String,
    desc: String,
    img:
    {
        data: Buffer,
        contentType: String
    }
});

//Image is a model which has a schema imageSchema

module.exports = new mongoose.model('Image', imageSchema);
Step 5 – Create an HTML form to upload the file/image
Create file/image upload Html form to upload image or file in MongoDB database; So visit the views directory and create an index.ejs file in it. Then add the following code to it:
<!DOCTYPE html>
<html lang="en">
<head>
    <meta charset="UTF-8">
    <meta name="viewport" content="width=device-width, initial-scale=1.0">
    <title>node js upload image to mongodb</title>
</head>
<body>
    <h1>Upload Image</h1>
    <form action="/uploadphoto" enctype="multipart/form-data" method="POST">
        <input type="file" name="myImage" accept="image/*">
        <input type="submit" value="Upload Photo">
    </form>
</body>
</html>
Step 6 – Import modules into App.js
Import express, body-parser, mongoose, multi dependencies in app.js; As shown below:
const express = require("express");
const app = express();
const bodyParser = require("body-parser");
const path = require('path');
const fs = require("fs");
const multer = require("multer");
const mongoose = require("mongoose");
var imageModel = require('../models/imageModel');


app.use(bodyParser.urlencoded(
      { extended:true }
))

app.set("view engine","ejs");

// SET STORAGE
var storage = multer.diskStorage({
    destination: function (req, file, cb) {
      cb(null, 'uploads')
    },
    filename: function (req, file, cb) {
      cb(null, file.fieldname + '-' + Date.now())
    }
  })

var upload = multer({ storage: storage })

app.get("/",(req,res)=>{
    res.render("index");
})

app.post("/uploadphoto",upload.single('myImage'),(req,res)=>{
    var img = fs.readFileSync(req.file.path);
    var encode_img = img.toString('base64');
    var final_img = {
        contentType:req.file.mimetype,
        image:new Buffer(encode_img,'base64')
    };
    imageModel.create(final_img,function(err,result){
        if(err){
            console.log(err);
        }else{
            console.log(result.img.Buffer);
            console.log("Saved To database");
            res.contentType(final_img.contentType);
            res.send(final_img.image);
        }
    })
})
//Code to start server
app.listen(3000,function () {
      console.log("Server Started at PORT 2000");
})
Step 7 – Start the App Server
You can use the following command to start the node js application server
//run the below command

npm start

after run this command open your browser and hit

http://127.0.0.1:3000/
Upload image in MySQL using angularJS
Create a new upload.php file and an upload folder.
Upload a file to upload a folder and return an Array in JSON format which has a file name.
Code:- This code will ask for the location and file name that you want to upload in which the file is no doubt the image you want to upload.
<?php

/* Getting file name */$filename = $_FILES['file']['name'];

/* Location */$location = 'upload/';

$response = array();
/* Upload file */if(move_uploaded_file($_FILES['file']['tmp_name'],$location.$filename)){
   $response['name'] = $filename;
} else{
   $response['name'] = "File not uploaded.";
}
echo json_encode($response);
exit;
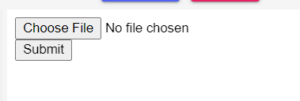
And now you are done with the coding part, run the code and you will get the below interface to upload the file:-