How to Write your first JUnit Test Case. In this article, we will continue with the previous example. If you haven’t read the previous article, don’t worry here we will create the application from scratch.
Example to Write Test Case with JUnit
In this example, we will create a JUnit Test Case to check if the String starts with the Upper case or not.
Step 1: Open Eclipse > File > New > Maven Project.
Step 2: Now, you will get a New Maven Project. Check the create a simple project. Click on Next.
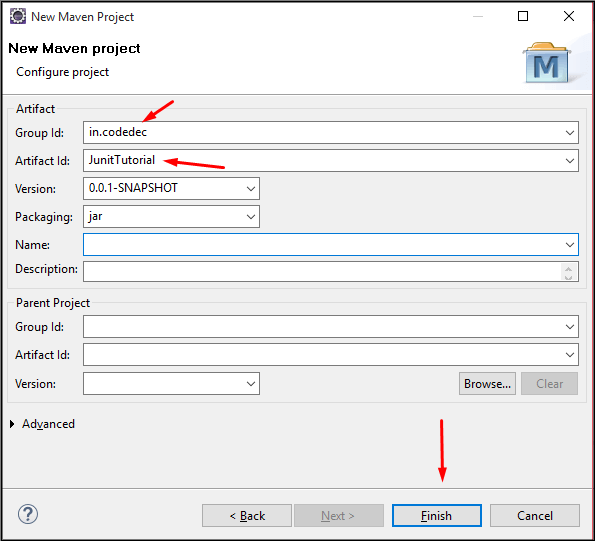
Step 3: Now, Enter group id, artifact id as shown below
Step 4: Now, create a StringUtil.java class inside the src/main/java folder.
package in.codedec.junit.util;

public class StringUtil {

    public boolean startsWithUpperCase(String str){
        return Character.isUpperCase(str.charAt(0));
    }
}
- Here, in this class, we created a method called startsWithUpperCase() that will check if the String starts with a Capital letter or not.
- The method is returning a boolean value.
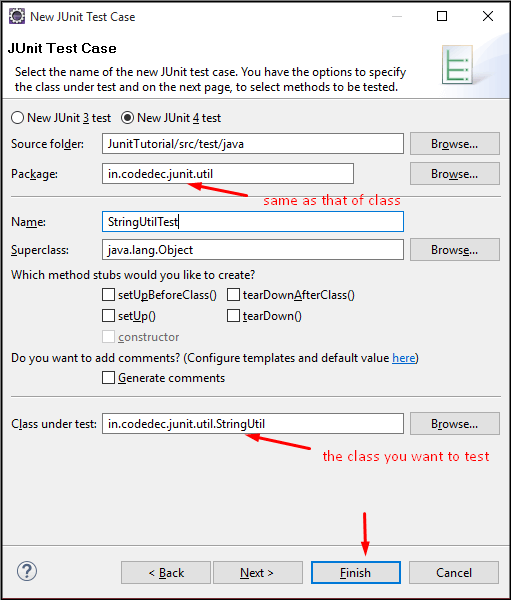
Step 5: Now, it is time to check this method. So we will create our First JUnit Test case. Here, we will keep our test file in a separate package. Mostly, we keep the test case file inside src/test/java. After that, click Finish. After Finish you will get the alert box, just click OK.
Step 6: Now, we will get the default test case generated and we will modify the code as shown below
package in.codedec.junit.util;

import static org.junit.Assert.*;

import org.junit.Test;

public class StringUtilTest {

    @Test
    public void test() {
        StringUtil stringUtil = new StringUtil();
        boolean actual = stringUtil.startsWithUpperCase("Codedec");
        boolean expected = true;
        assertEquals(expected, actual);
    }

}
- On-line no:11, we have created the object of the class that needs to be tested.
- On-line no:12, the method startWithUpperCase() is passed with “Codedec” String. This method will return the boolean value which will be the actual output.
- On-line no:13, the expected output is passed.
- Now, On-line no:14, the assertEquals() method is called with both expected and actual output. It will check if both the values match then the test case is run successfully with 0 failures.
Step 7: Now, Run the Application as Junit Test and see the following stack trace.

Here, we can see the green bar that implies the test is run without error.
Now, let us change both the expected and actual output:
    @Test
    public void test() {
        StringUtil stringUtil = new StringUtil();
        boolean actual = stringUtil.startsWithUpperCase("codedec");
        boolean expected = true;
        assertEquals(expected, actual);
    }
- Here, the startWithUpperCase() method is passed with the “codedec” string which doesn’t start with a Capital letter. So this method will return false now.
- The expected value is set to true.
- Now, the assertEquals() method will result in failure and we will get the following output.
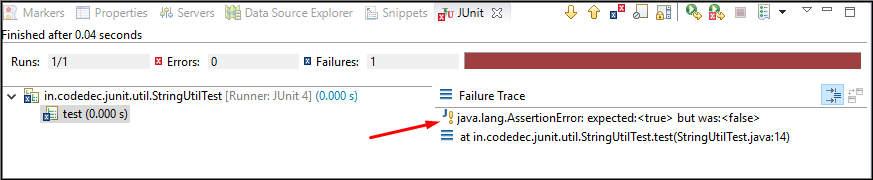
Here, we can see the red bar that implies the test has failed. Even the reason also you can see in the Failure Trace.
Thus, this is How you write your First Junit Test Case. Now, let us do some modifications here:
Instead of taking two-variable like expected and actual, we can directly pass it in the assertEquals() method as shown below:
@Test
public void test() {
    StringUtil stringUtil = new StringUtil();
    assertEquals(true, stringUtil.startsWithUpperCase("Codedec"));
}
Thus, this was all about the First JUnit Test Case to check if the String starts with a Capital letter. In the next article, we will see the Assertion method of the JUnit Test Case.