We all have used social platforms like Instagram and Facebook. The one thing common in all is that users can upload images, videos on them. We upload our files on a server and then others view it. That is the whole concept of social media. So, how Django upload a file? We will be answering the same question in this article. The contents of this article are:
- How to upload and display image in Django.
- Configuring settings.
- A User Profile Application.
So, let’s get started.
Setup
On the command line, navigate there and create a directory upload for our files. We will use Pipenv to install both Django and pillow which is a Python image process library Django relies on for image files. For non-image file uploads, pillow is not needed. Finally activate our new virtual environment with the shell command.
$pipenv install django==3.0.3 pillow==7.0.0
Project and App
Now create our new Django project called upload and a new app called uploadimg
$ django-admin startproject upload
$ python manage.py startapp uploadimg
- The very first step is to add below code in the settings.py file.
MEDIA_URL = '/media/'

# Path where media is stored

MEDIA_ROOT = os.path.join(BASE_DIR, 'media/')
- Since we’ve added a new app we need to tell Django about it at the bottom of the INSTALLED_APPS configuration in settings.py.
- Now run python manage.py migrate to setup the new database for our project.
Coding the app
- As usual, we need to deal with some data(title, image). So, we need to create the forms.py accordingly:
from django import forms
from uploadimg.models import Image


class ImageForm(forms.ModelForm):
    """Form for the image model"""

    class Meta:
        model = Image
        fields = ('title', 'image')
- Configure the views.py accordingly
from django.shortcuts import render, redirect

from uploadimg.forms import ImageForm


def index(request):
    """Process images uploaded by users"""
    if request.method == 'POST':
        form = ImageForm(request.POST, request.FILES)
        if form.is_valid():
            form.save()
            # Get the current instance object to display in the template
            img_obj = form.instance
            return render(request, 'index.html', {'form': form, 'img_obj': img_obj})
    else:
        form = ImageForm()
    return render(request, 'index.html', {'form': form})
- Configure the models.py accordingly
from django.db import models


class Image(models.Model):
    title = models.CharField(max_length=200)
    image = models.ImageField(upload_to='images')

    def __str__(self):
        return self.title

    class Meta:
        db_table = "myapp_image"
Creating UI for Django Upload Image
- Now, in the templates folder, create index.html and add the following code:
<!DOCTYPE html>
<html lang="en">
<head>
  <meta charset="utf-8">
  <meta name="viewport" content="width=device-width, initial-scale=1, shrink-to-fit=no">
  <meta name="description" content="">
  <meta name="author" content="">
  <title>upload imagae</title>
</head>
<body>
<p><h1>Django Uploading Images</h1></p>
<p><h4>pip install Pillow</h4></p>
<form method="post" enctype="multipart/form-data">
  {% csrf_token %}
   {{ form.as_p }}
  <button type="submit">Upload</button>
</form>

{% if img_obj %}
  <h3>Succesfully uploaded : {{img_obj.title}}</h3>
  <img src="{{ img_obj.image.url}}" alt="connect" style="max-height:300px">
{% endif %}

</body>
</html>
Configuring the urls.py
- To redirect our website to certain pages we need to make the following changes in the urls.py file:
from django.contrib import admin
from django.urls import path
from uploadimg import views

from django.conf import settings
from django.conf.urls.static import static

urlpatterns = [
    path('admin/', admin.site.urls),
    path('', views.index),
]

if settings.DEBUG:
    urlpatterns += static(settings.MEDIA_URL, document_root=settings.MEDIA_ROOT)
Configuring the admin.py
- Now update the uploadimg/admin.py file so we can see our upload app in the Django admin.
from django.contrib import admin

from .models import Image

admin.site.register(Image)
Running the app
- Now let’s try running the app. Make sure your development server is running. If not you can use the following command in your Windows PowerShell to run your development server.
python manage.py runserver
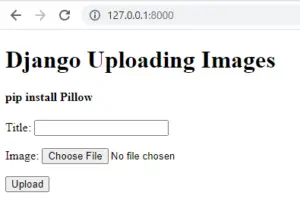
- On running the server, you will get the following
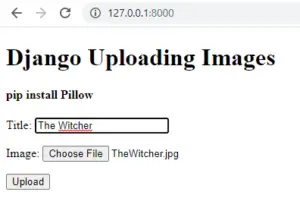
- Let’s try to upload a image and see whether it is getting uploaded:
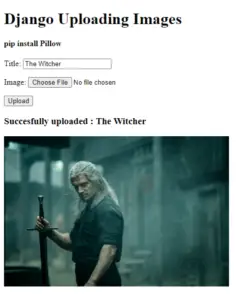
- Now, on clicking the upload our image will be uploaded and the image will be displayed:
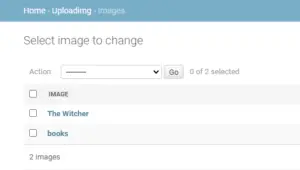
- On checking the backend i.e. admin panel we can see the image is uploaded in the backend also:
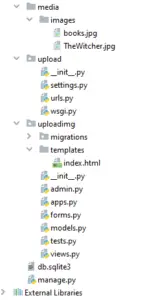
- Since we mentioned the path as media, so a media folder will be created in the project folder and the images will be added there accordingly: