In order to create an application or a project in Spring, we need to Set up the complete environment for Spring Framework. In this tutorial, we will cover all the components that are required to run a Spring Application/Project.
How to Set up the Environment?
If you are a beginner, I am going to tell you How to set up the Environment and start creating Spring Project/applications from scratch. Following are the list of application you need to Install.
- JDK(Java Development Kit)
- Java Application Server
- IDE for Spring. we will be using Spring STS in Our tutorial.
JDK(Java Development Kit)
JDK is a development environment for building applications using Java Programming language. It includes tools useful for developing and testing programs.
Download JDK https://www.oracle.com/java/technologies/javase/javase-jdk8-downloads.html. After Downloading JDK, it will ask you to install JRE(Java Runtime Environment) to install it. Now You have to set up some Environment variables in your OS.
- Go to My Computer, Right Click on it. Click Properties.
- Click on Advanced System Setting
- Click on Environment Variable.
- In The System Variable, Click on Path and edit it.
- Add the java installation path to the path variable like “C:\Program Files\jdk1.8.0_20\bin” (it should be a double quote)
- Click OK and Ok.
- Just restart your PC
- Now Open cmd prompt and type “Java version” (for checking whether it is installed)
- It will return the Java Version else you need to follow these steps again.
Why do we set Environment variables?
Environment variables are the global variables accessed by processes under OS.
- The PATH is set so that our OS is able to access .exe files from the command line.
- When we compile a java code we need javac.exe inside the bin directory where JDK is installed (for ex. C:\Program Files\Java\jdk1.8.0_91\bin).
- If we don’t set the PATH in Environment variable every time you compile or run you have to provide a complete path of javac.
- Once you set the PATH Environment variable you can compile and run the program without giving a complete javac path every time.
Java Application Server
In order for web applications to run, we will need a Web Server. There are different web servers available such as Tomcat Apache, Glassfish, Geronimo, etc. In our application, we will use the popular Apache Tomcat Server.
- Get the Apache Server from https://tomcat.apache.org/download-90.cgi and Download it.
- Unzip the file into some Locations.
- Now click on the Setup, Click next on the setup.
- Then, Click I agree with the license agreement.
- Check the Component button and click Next.
- Enter username and password(make it easy so that you can remember it) and click Next.
- Now see whether the path for the JRE is right and then click Next.
- Click Install and wait till the installation completes.
- At last, Click the Finish button. (You can uncheck both the options here which are Read me files and Run apache)
Let us Verify its installation
- Open your web browser
- Type in http://localhost:8080
- If you are able to see the apache tomcat page then the installation is successful.
Spring Tool Suite
Spring Tool Suite provides the IDE(Integrated Development Environment) for developing world-class Enterprise applications.
- Get the Spring Tool Suite from https://spring.io/tools and Download the STS for Eclipse 4 according to your PC Configuration.
- Wait for it to download, and then Double click on STS Jar files and It will extract all the files.

- It would extract like the following folder.

- Open this sts-4.9.0.RELEASE folder and Open the Spring Tool Suite 4 application.
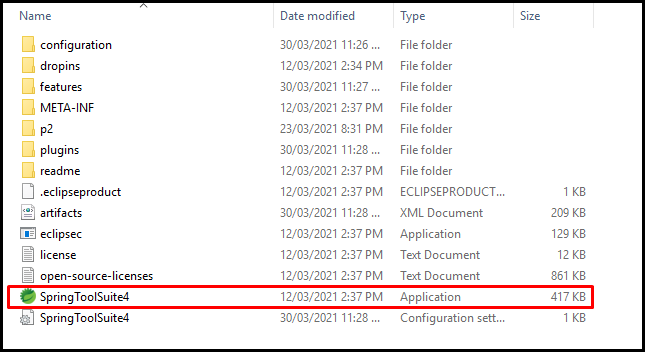
- You can create a shortcut for this application on the Desktop. Just right-click on and send to Desktop. Just Double Click on it and it would start the STS.
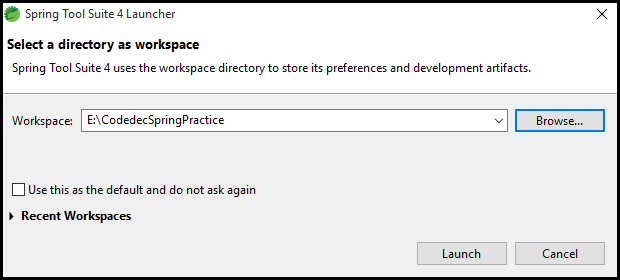
- Now, It will ask you to create a workspace. Workspace is nothing but the storage where all your projects will be stored or created. Just click on Browse and select any Drive and create a workspace and click on Launch.
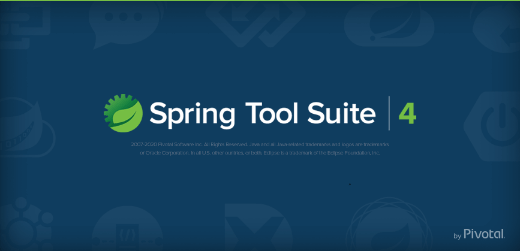
- It would take a couple of minutes and your STS will be launched.
Thus, this is complete detail about How to set up the Environment for the Spring Application. In the next article of this tutorial, we will head towards the important concept called Inversion of Control.