In the previous article, we have seen Java Database Connectivity in MYSQL. This tutorial will help us to write Java code to establish a database connection with the Oracle Database server.
Oracle is one of the most popular Databases Management System (DBMS) produced by Oracle corporation. Oracle is mainly available in three main editions
- Enterprise Edition(EE): It is a common and expensive edition.
- Standard Edition(SE): It is a limited edition of Enterprise Edition.
- Expression Edition(XE): It is free to use version.
In this article, we will be using Expression Edition(XE).
Installation of Oracle XE
We will install Oracle 11g on windows OS. These steps will help you through the installation steps.
- First, we have to download software from https://www.oracle.com/database/technologies/oracle-database-software-downloads.html.Choose the platform.
- After downloading unzip the file you will get setup.exe file. Now Right-click on the installer file and Run as Administrator. An installer window will pop up.
- We can skip the configuration setting options. Now, click Next.
- Now, Choose your system class (choose desktop class) and click Next.
- Select the path where you want to install the software and now write a username and password and click Next.
- Now, Oracle will checks the software requirement and it will show you the installation summary and then click Next.
- Now Oracle will install the setup files and configuration settings. (If any pop is there for firewalls please allow it)
- Now we can see DBCA is installing(Database Configuration Assistant). It will complete the installation (one pop up will be there where with the help of password management we can change the password for the system)
- Now just check the installation is done or not by opening cmd with run as administrator
- set oracle_sid=orcl
- Sqlplus/as sysdba
- After this command, you will see the Oracle Database 11g Edition is connected. (If any error is there follow these steps once again)
Download JDBC Driver library for Oracle
We need to have ODBC(Oracle JDBC Driver) present in the classpath. Click here https://www.oracle.com/database/technologies/appdev/jdbc-downloads.html Then select the JDBC version that matches the Oracle database server. Click the jar file ojdbc11.jar set it by going to the Environment variable and click on the new tab. In variable name write classpath and in variable value paste the path to ojdbc11.jar by appending ojdbc11.jar; as C:\oraclexe\app\oracle\product\11.2.0\server\jdbc\lib\ojdbc11.jar;
There are some categories for JDBC Driver
- Thin Driver: For client-side use without an Oracle installation
- OCI Driver: For client-side us with an Oracle Installation.
- Server-side Thin Driver: Runs inside an Oracle server.
- Server-side Internal Driver: Runs inside a target server.
Register Oracle JDBC Driver
After downloading drivers we have to register it, so there are two ways we can do this.
Class.forName("oracle.jdbc.driver.OracleDriver");
OR
DriverManager.registerDriver(new oracle.jdbc.driver.OracleDriver());
Establish Connection with Database
We can do this by calling the getConnection() method of DriverManager class (This method we have seen in the previous article). The following are the three different ways in which we can call.
- getConnection(String url)
- getConnection(String url,Properties info)
- getConnection(String url, String username, String password)
String dbURL="jdbc:oracle:thin:@localhost:1521:xe";
String username="root";
String password="root";
Connection con=DriverManager.getConnection(dbURL,username,password);
if(con!=null)
{
System.out.pritnln("Connection Established");
}
else
{
System.out.pritnln("Error!!!");
}
Example for JDBC in Oracle
Open SQLPlus from the start menu(Run SQL cmd Line) and execute the following command

create table demo_table(rollno number(15), name varchar2(20))
We have created a table in the Oracle database with Column Roll No and Name.
index.html
<body>
<h1><a href="JDBCExample">Show</a></h1>
</body>
web.xml
<servlet>
  <servlet-name>JDBCExample</servlet-name>
  <servlet-class>JDBCExample</servlet-class>
</servlet>
<servlet-mapping>
  <servlet-name>JDBCExample</servlet-name>
  <url-pattern>/JDBCExample</url-pattern>
</servlet-mapping>
DatabaseCon.java
import java.sql.Connection;
import java.sql.DriverManager;
import java.sql.SQLException;

public class DatabaseCon {
  protected static Connection getConn() throws SQLException, ClassNotFoundException {
    String dbDriver = "oracle.jdbc.driver.OracleDriver";
    String dbURL = "jdbc:oracle:thin:@localhost:1521:xe";
    String dbUsername = "root";
    String dbPassword = "root";
    Class.forName(dbDriver);
    Connection con = DriverManager.getConnection(dbURL, dbUsername, dbPassword);
    return con;

  }
}
JDBCExample.java
protected void doGet(HttpServletRequest req, HttpServletResponse resp) throws ServletException, IOException {

    try {
      Connection connection = DatabaseCon.getConn();
      Statement statement = connection.createStatement();
      ResultSet set = statement.executeQuery("select * from demo_table");
      PrintWriter printWriter = resp.getWriter();
      printWriter.println("<html><body>");
      printWriter.println("<table border=1>");
      printWriter.println("<tr><th>ROll NO</th><th>Name</th>");
      while (set.next()) {

        int roll = set.getInt("rollno");
        String name = set.getString("name");
        printWriter.println("<tr><td>" + roll + "</td><td>" + name + "</td></tr>");

      }
      printWriter.println("</table>");
      printWriter.println("</body></html>");
    } catch (ClassNotFoundException e) {
      // TODO Auto-generated catch block
      e.printStackTrace();
    } catch (SQLException e) {
      // TODO Auto-generated catch block
      e.printStackTrace();
    }

  }
Thus We get the following output
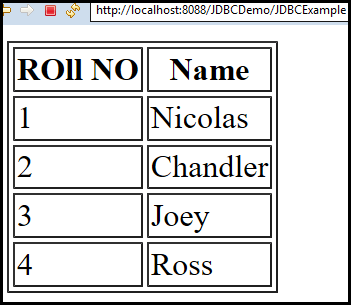
Thus, this is How we connect our Oracle Database to Servlet in any web application.