In order to create an application or a project in Spring Boot, we need to Set up the complete environment for Spring Boot. In this tutorial, we will cover all the components that are required to run a Spring Boot.
How to Set up the String Boot Configuration?
As we know, Spring Boot acts as a utility for setting up an application for building web applications. Spring Boot is built on Spring Framework which is used for creating web applications with minimal configuration.
Following are the ways to create a Spring Boot Application:
- Create a Maven project and add starter dependencies. (legacy)
- Using Spring Initializr(Used more often)
- Use IDE STS. (Spring Tool Suite) (Used more often)
- Using Command Line Interface.
Here, first, we will understand How to create an Application using Spring Initializr.
Spring Initializr
Spring Boot project structure is generated with the help of Spring Initializr. Spring Initializr is a web-based tool provided by Pivotal Web Service.
It lets you choose the project type, language type, Spring Boot version, and Java Version. Not only this, it makes the project structure creation easy by giving the options for the project to add Metadata. If you need any dependencies, there is an option to add dependencies also.
Modules of Spring Initializr
- initializr-actuator: It is an optional module that provides additional information on the project generation.
- initializr-bom: Spring boot has a special kind of POM file called BOM which acronyms to Bill of Materials that is used to control the versions of the project dependencies.
- initializr-docs: It is used to provide documentation.
- initializr-generator: It is a core project generation lib.
- initializr-generator-spring: It is an optional module defining the conventions for a typical Spring Boot project.
- initializr-generator-test: It provides a test infrastructure for project generation.
- initializr-metadata: It has metadata infrastructure for various aspects of the project.
- initializr-service-sample: It provides basic custom instances.
- initializr-version-resolver: It is an optional module to extract version numbers from an arbitrary POM.
- initializr-web: It provides web endpoints for third-party clients.
Let us see How to generate a project using Spring Initializr
- First, go to https://start.spring.io/.
- Here, there are some fields available, you have to fill according to your requirement.
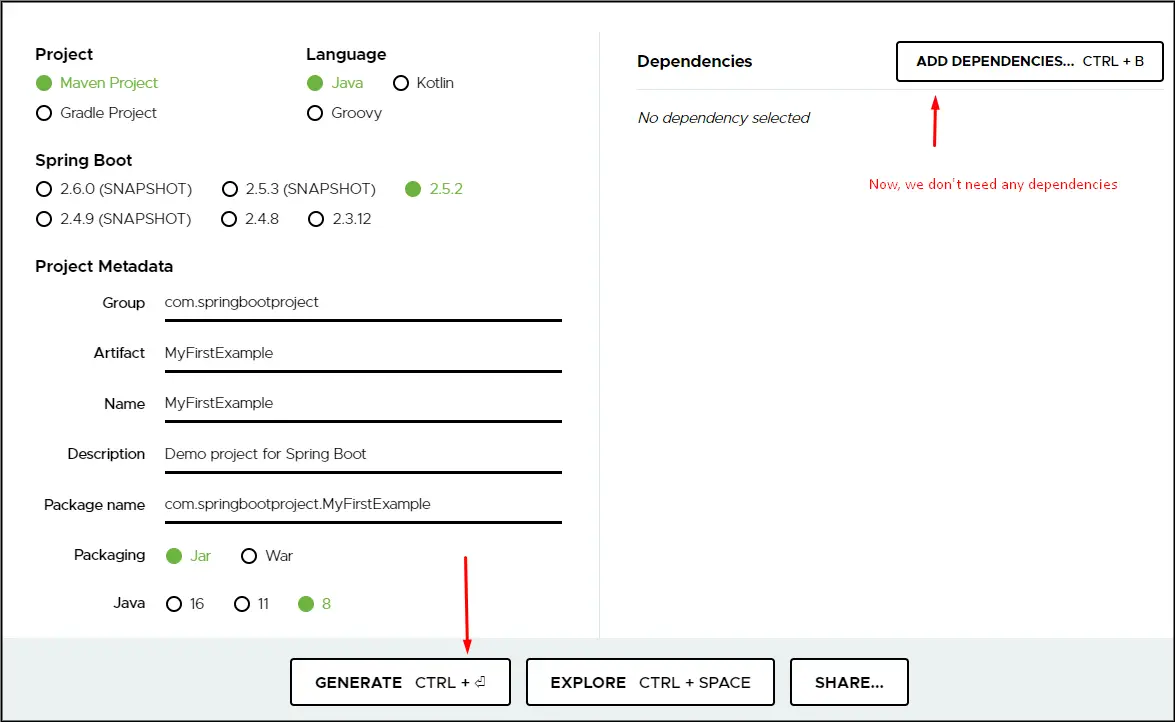
- First is Project means what type of project we are going to build whether it is the maven or Gradle project?
- Next is the Language, which language you are going to use. in our case we will use Java.
- Next is the Spring Boot version, It selects the latest stable version ie 2.5.2.
- Now, It is Project Metadata means, information about the project such as Group, Artifact and etc.
Metadata |
Description |
| Group | Package Name |
| Artifact Id | Application Name/Project Name |
| Name | It is the same as Artifact Id |
| Description | We can write a description of the project. |
| PackageName | Package Name of the project |
| Packaging | We can select either jar or war |
- The next option is Java, It tells us to select the version which we want to use.
At last, select the Generate button. As soon as you click on it, it will generate a project structure for you along with the dependencies and will be downloaded as a zip file.
Now, go to the downloads folder and see the projects. Now, just extract the zip file to any location. It will look like this.

Now, You will need an IDE to run this project. The IDE we will be using is Spring Tool Suite. Let us see the steps to download STS.
Spring Tool Suite provides the IDE(Integrated Development Environment) for developing world-class Enterprise applications.
- Get the Spring Tool Suite from https://spring.io/tools and Download the STS for Eclipse 4 according to your PC Configuration.
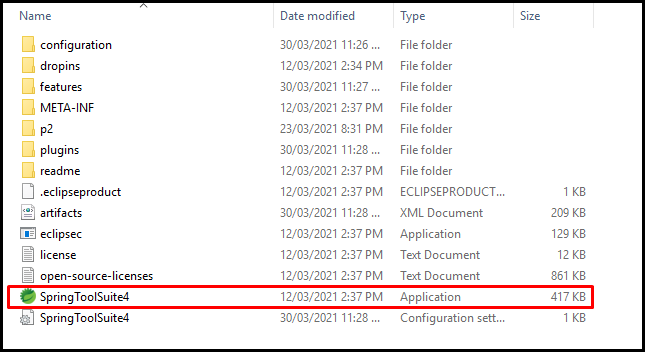
- Wait for it to download, and then Double click on STS Jar files and It will extract all the files.

- It would extract like the following folder

- Open this sts-4.9.0.RELEASE folder and Open the Spring Tool Suite 4 application.
- You can create a shortcut for this application on the Desktop. Just right-click on and send to Desktop. Just Double Click on it and it would start the STS.
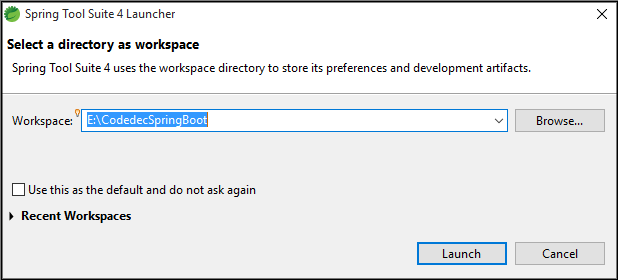
- Now, It will ask you to create a workspace. Workspace is nothing but the storage where all your projects will be stored or created. Just click on Browse and select any Drive and create a workspace and click on Launch.
- It would take a couple of minutes and your STS will be launched.
Import a Project
Now, it’s time to import the project that we created above with SPring Initializr into STS. Go to File > Import > Maven > Existing Maven Project > Next > Browse > Select the project > Finish. Now it will take time to import the project and will import all the dependencies in case you added. Following is the project structure.

Now just go to the MyFirstExampleApplication.java and run it as Java Application.
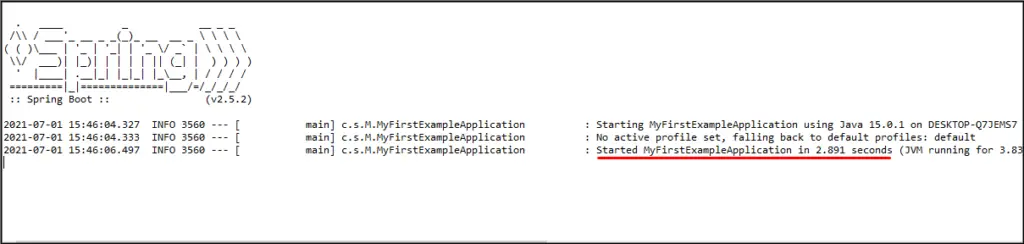
Here, the message “Started ….” shows that the application runs successfully.
Thus, this is how we generate Project using Spring Initializr and import it into an STS IDE. In the next article of this tutorial, we will create a spring boot project using STS directly.