In this tutorial, we will learn how to take user input data in react js. But to do that,
- There must need to be a form to add user data
- Need some input fields inside the form to get the input value.
Note: please read this article to learn about creating a form to Add user and creating a reusable component.
To take the input values,
- Create states
- Add onChange() events
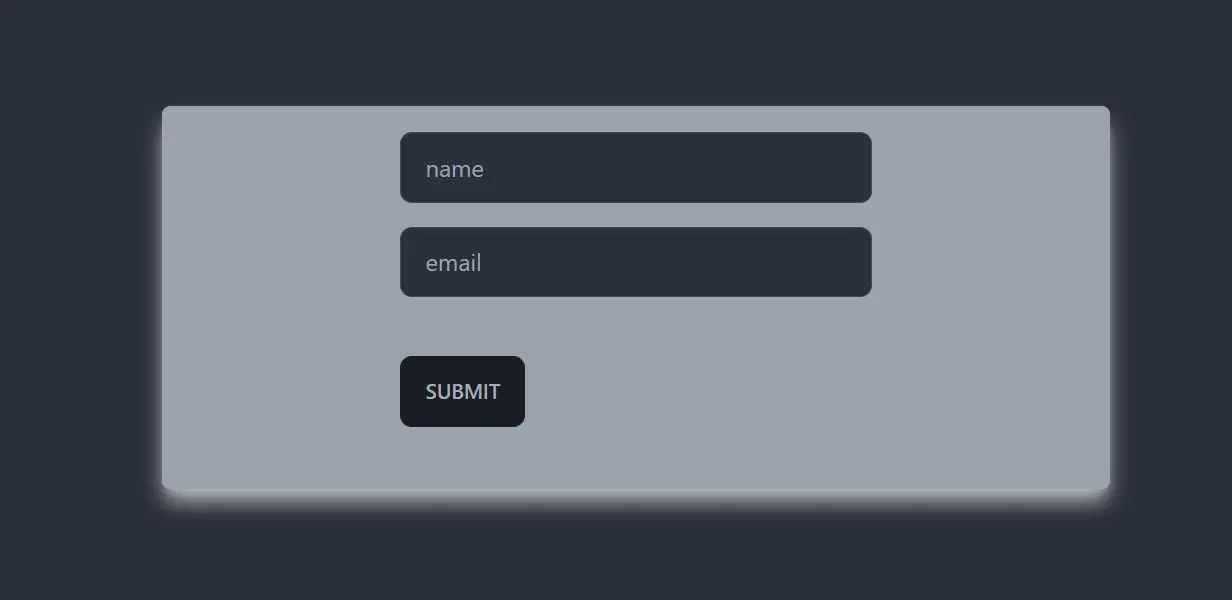
Below is the code snippet for the form, (AddUser.js component)
import React from 'react';
import Button from './Button';
import Card from './Card';

const AddUser = () => {
    const handleFormSubmission = e => {
        e.preventDefault();

    }
    return (
        <div>
            <Card className="bg-gray-400 mx-auto my-24 rounded-md shadow-gray-300 shadow-lg w-1/2">
                <form
                    onSubmit={handleFormSubmission}
                    className='border-2 border-gray-400 shadow-lg rounded-md'>
                    <div className='my-4 block mx-auto w-1/2'>
                        <label htmlFor="name"></label>
                        <input className='input input-bordered w-full max-w-xs' id='name' name="name" type="text" placeholder='name' />
                    </div>
                    <div className='my-4 block mx-auto w-1/2'>
                        <label htmlFor="email"></label>
                        <input className='input input-bordered w-full max-w-xs' id='email' name="email" type="email" placeholder='email' />
                    </div>

                    <div className=' my-10 block mx-auto w-1/2'>
                        <Button className='btn' type="submit">Submit</Button>
                    </div>
                </form>
            </Card>
        </div>
    );
};

export default AddUser;
And in the App.js component,
import React from "react";
import AddUser from "./AddUser";
import './App.css'
const App = () => {

  return (
    <div>
      <AddUser />
    </div>
  );
}

export default App
Note: Please read this article to learn about using Tailwind CSS styles in react.
Create states
- Create a state to hold the user name data
const [userName, setUserName] = useState('');
- Create a state for the email as well,
const [userEmail, setUserEmail] = useState('');
import React, { useState } from 'react';
import Button from './Button';
import Card from './Card';

const AddUser = () => {
    const [userName, setUserName] = useState('');
    const [useEmail, setUserEmail] = useState('');
    const handleFormSubmission = e => {
        e.preventDefault();

    }
    return (
        <div>
            <Card className="bg-gray-400 mx-auto my-24 rounded-md shadow-gray-300 shadow-lg w-1/2">
                <form
                    onSubmit={handleFormSubmission}
                    className='border-2 border-gray-400 shadow-lg rounded-md'>
                    <div className='my-4 block mx-auto w-1/2'>
                        <label htmlFor="name"></label>
                        <input className='input input-bordered w-full max-w-xs' id='name' name="name" type="text" placeholder='name' />
                    </div>
                    <div className='my-4 block mx-auto w-1/2'>
                        <label htmlFor="email"></label>
                        <input className='input input-bordered w-full max-w-xs' id='email' name="email" type="email" placeholder='email' />
                    </div>

                    <div className=' my-10 block mx-auto w-1/2'>
                        <Button className='btn' type="submit">Submit</Button>
                    </div>
                </form>
            </Card>
        </div>
    );
};

export default AddUser;
Add onChange() events
- Add an onChange() event handler in the input form named, name.
<input onChange={e => setUserName(e.target.value)}
      className='input input-bordered w-full max-w-xs'
      id='name' name="name"
      type="text"
      placeholder='name'/>
Here, we have added an onChange() event and set the state for the name to its state variable.
- Add onChange() to email as well,
<input
                            onChange={e => setUserEmail(e.target.value)}
                            className='input input-bordered w-full max-w-xs'
                            id='email'
                            name="email"
                            type="email"
                            placeholder='email'
                            />
import React, { useState } from 'react';
import Button from './Button';
import Card from './Card';

const AddUser = () => {
    const [userName, setUserName] = useState('');
    const [userEmail, setUserEmail] = useState('');
    const handleFormSubmission = e => {
        e.preventDefault();

    }
    return (
        <div>
            <Card className="bg-gray-400 mx-auto my-24 rounded-md shadow-gray-300 shadow-lg w-1/2">
                <form
                    onSubmit={handleFormSubmission}
                    className='border-2 border-gray-400 shadow-lg rounded-md'>
                    <div className='my-4 block mx-auto w-1/2'>
                        <label htmlFor="name"></label>
                        <input
                            onChange={e => setUserName(e.target.value)}
                            className='input input-bordered w-full max-w-xs'
                            id='name' name="name"
                            type="text"
                            placeholder='name'
                        />
                    </div>
                    <div className='my-4 block mx-auto w-1/2'>
                        <label htmlFor="email"></label>
                        <input
                            onChange={e => setUserEmail(e.target.value)}
                            className='input input-bordered w-full max-w-xs'
                            id='email'
                            name="email"
                            type="email"
                            placeholder='email'
                        />
                    </div>

                    <div className=' my-10 block mx-auto w-1/2'>
                        <Button className='btn' type="submit">Submit</Button>
                    </div>
                </form>
            </Card>
        </div>
    );
};

export default AddUser;
Now, whatever is written inside the input fields, will be saved in their respective states. We can check this by console.log.
console.log({
        name: userName,
        email: userEmail
    })
import React, { useState } from 'react';
import Button from './Button';
import Card from './Card';

const AddUser = () => {
    const [userName, setUserName] = useState('');
    const [userEmail, setUserEmail] = useState('');
    const handleFormSubmission = e => {
        e.preventDefault();

    }
    console.log({
        name: userName,
        email: userEmail
    })
    return (
        <div>
            <Card className="bg-gray-400 mx-auto my-24 rounded-md shadow-gray-300 shadow-lg w-1/2">
                <form
                    onSubmit={handleFormSubmission}
                    className='border-2 border-gray-400 shadow-lg rounded-md'>
                    <div className='my-4 block mx-auto w-1/2'>
                        <label htmlFor="name"></label>
                        <input
                            onChange={e => setUserName(e.target.value)}
                            className='input input-bordered w-full max-w-xs'
                            id='name' name="name"
                            type="text"
                            placeholder='name'
                        />
                    </div>
                    <div className='my-4 block mx-auto w-1/2'>
                        <label htmlFor="email"></label>
                        <input
                            onChange={e => setUserEmail(e.target.value)}
                            className='input input-bordered w-full max-w-xs'
                            id='email'
                            name="email"
                            type="email"
                            placeholder='email'
                        />
                    </div>

                    <div className=' my-10 block mx-auto w-1/2'>
                        <Button className='btn' type="submit">Submit</Button>
                    </div>
                </form>
            </Card>
        </div>
    );
};

export default AddUser;
Check the browser console,
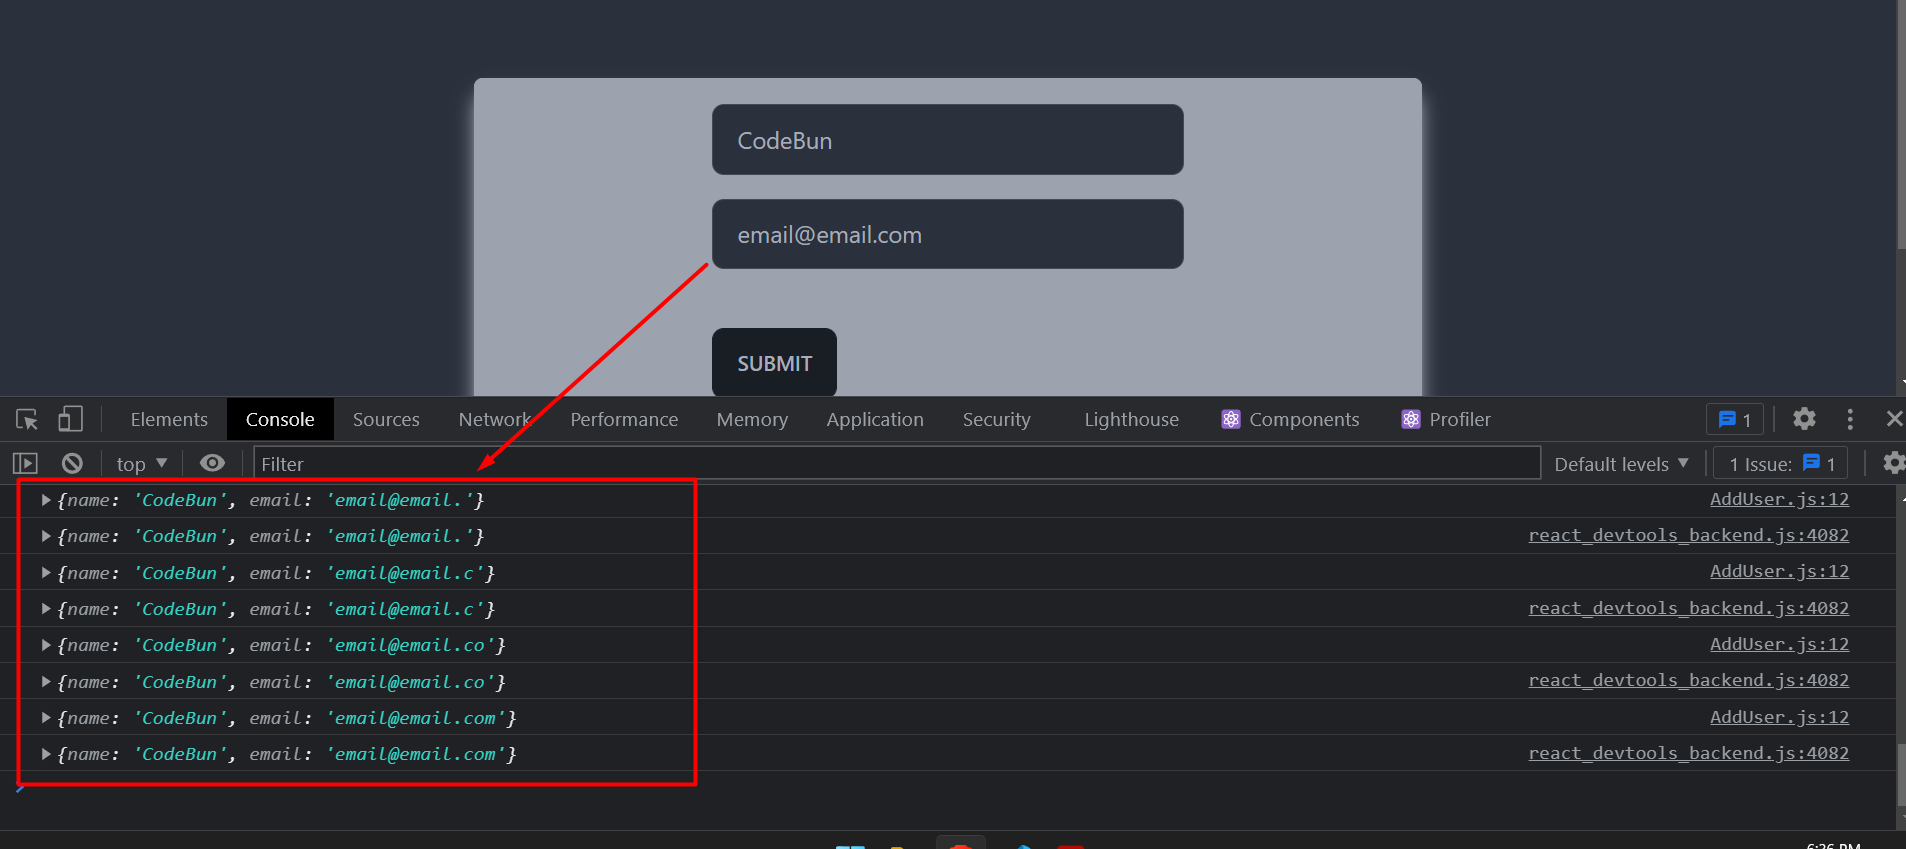
As we can see in the console, with each change in the input fields, the input data is being saved in the state variables.