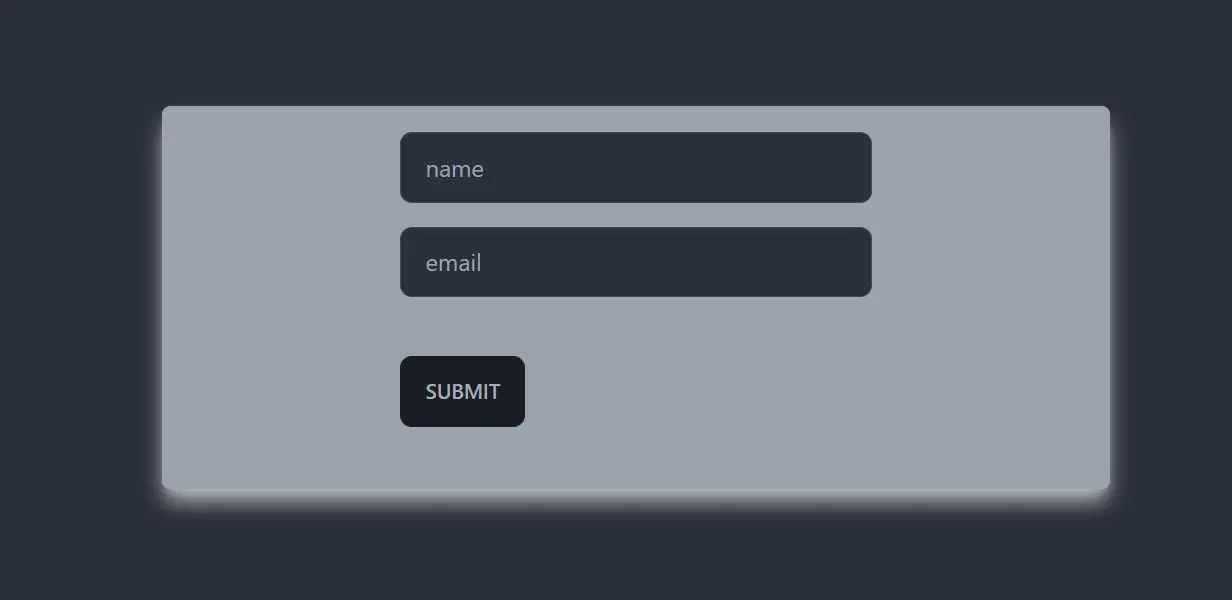
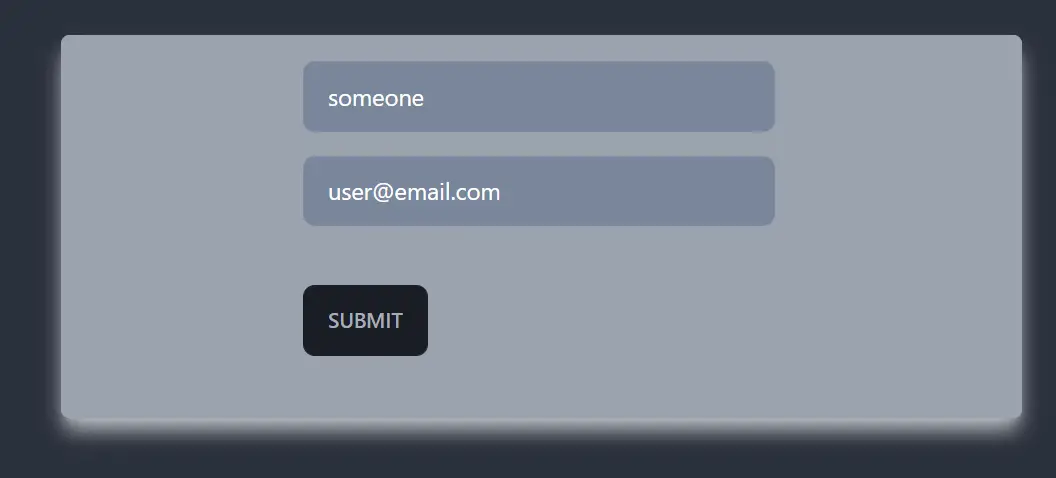
In this article, we will learn how to add user data and display the data in a list and in React. Let’s create a simple react application that contains a form with a username and email when the user enters the data and submits it. the added data will be displayed in a list.
React Application to Add and display user data
app.js
import React from "react";
import AddUser from "./AddUser";
import './App.css'
const App = () => {

  return (
    <div>
      <AddUser />
    </div>
  );
}

export default App
In AddUser.js
import React, { useState } from 'react';
import Button from './Button';
import Card from './Card';

const AddUser = () => {
    const [userName, setUserName] = useState('');
    const [userEmail, setUserEmail] = useState('');
    const handleFormSubmission = e => {
        e.preventDefault();
        if (!userName || !userEmail) {
            return;
        };
        setUserEmail('');
        setUserName('');
        console.log({
            name: userName,
            email: userEmail
        });

    }
    return (
        <div>
            <Card className="bg-gray-400 mx-auto my-24 rounded-md shadow-gray-300 shadow-lg w-1/2">
                <form
                    onSubmit={handleFormSubmission}
                    className='border-2 border-gray-400 shadow-lg rounded-md'>
                    <div className='my-4 block mx-auto w-1/2'>
                        <label htmlFor="name"></label>
                        <input
                            value={userName}
                            onChange={e => setUserName(e.target.value)}
                            className='input input-bordered w-full max-w-xs'
                            id='name' name="name"
                            type="text"
                            placeholder='name'
                        />
                    </div>
                    <div className='my-4 block mx-auto w-1/2'>
                        <label htmlFor="email"></label>
                        <input
                            value={userEmail}
                            onChange={e => setUserEmail(e.target.value)}
                            className='input input-bordered w-full max-w-xs'
                            id='email'
                            name="email"
                            type="email"
                            placeholder='email'
                        />
                    </div>

                    <div className=' my-10 block mx-auto w-1/2'>
                        <Button className='btn' type="submit">Submit</Button>
                    </div>
                </form>
            </Card>
        </div>
    );
};

export default AddUser;
Note: Please read this article to know more about taking user data in React
- Add user list
- Manage user list
These are the topic that we will discuss today.
Add user data into reactJS
- Create a component named, UserList.js
import React from 'react';

const UserLists = () => {
    return (
        <div>

        </div>
    );
};

export default UserLists;
- Import this component in the app.js component under the AddUser component
import React from "react";
import AddUser from "./AddUser";
import './App.css'
import UserLists from "./components/UserLists";
const App = () => {

  return (
    <div>
      <AddUser />
      <UserLists />
    </div>
  );
}

export default App
Now create a state to get the user data and create a function here to add new data to the user list state,
// state for user list
const [usersList, setUsersList] = useState([]);

// function for adding a user data to existing user list
const addUserHandler = (uName, uEmail) => {
  setUsersList((prevData) => {
    return [...prevData, { name: uName, email: uEmail }]
  })
}
In the app.js file, we have created this function to get the user data and add the data to the user list array. we have declared these methods in a parent component of the AddUser and UserLists components. And that is the App component.
import React, { useState } from "react";
import AddUser from "./AddUser";
import './App.css'
import UserLists from "./components/UserLists";
const App = () => {
  // state for user list
  const [usersList, setUsersList] = useState([]);

  // function for adding a user data to existing user list
  const addUserHandler = (uName, uEmail) => {
    setUsersList((prevData) => {
      return [...prevData, { name: uName, email: uEmail }]
    })
  }
  return (
    <div>
      <AddUser addUserHandler={addUserHandler} />
      <UserLists usersList={UserLists} />
    </div>
  );
}

export default App
- Go to the AddUser component, and get this addUserHandler function from the props argument.
import React, { useState } from 'react';
import Button from './Button';
import Card from './Card';

const AddUser = ({ addUserHandler }) => {
    const [userName, setUserName] = useState('');
    const [userEmail, setUserEmail] = useState('');
    const handleFormSubmission = e => {
        e.preventDefault();
        if (!userName || !userEmail) {
            return;
        };
        setUserEmail('');
        setUserName('');
        addUserHandler(userName, userEmail);
    }
    return (
        <div>
            <Card className="bg-gray-400 mx-auto my-24 rounded-md shadow-gray-300 shadow-lg w-1/2">
                <form
                    onSubmit={handleFormSubmission}
                    className='border-2 border-gray-400 shadow-lg rounded-md'>
                    <div className='my-4 block mx-auto w-1/2'>
                        <label htmlFor="name"></label>
                        <input
                            value={userName}
                            onChange={e => setUserName(e.target.value)}
                            className='input input-bordered w-full max-w-xs'
                            id='name' name="name"
                            type="text"
                            placeholder='name'
                        />
                    </div>
                    <div className='my-4 block mx-auto w-1/2'>
                        <label htmlFor="email"></label>
                        <input
                            value={userEmail}
                            onChange={e => setUserEmail(e.target.value)}
                            className='input input-bordered w-full max-w-xs'
                            id='email'
                            name="email"
                            type="email"
                            placeholder='email'
                        />
                    </div>

                    <div className=' my-10 block mx-auto w-1/2'>
                        <Button className='btn' type="submit">Submit</Button>
                    </div>
                </form>
            </Card>
        </div>
    );
};

export default AddUser;
We have got the addUserHandler function and passed the name and email as parameters to it.
This way we can add users in the usersList state.
Managing user list
- Pass the userList state variable to the UsersList component,
<UserLists usersList={UserLists} />
Now, we will get the user data as props in this UserLists component.
import React from 'react';
const UserLists = ({ usersList }) => {
    return (
        <div>

        </div>
    );
};

export default UserLists;
- Add some styles in this component and show the user data dynamically,
import React from 'react';
const UserLists = ({ usersList }) => {
    return (
        <div className="bg-gray-400 mx-auto my-24 rounded-md shadow-gray-300 shadow-lg w-1/2">
            <ul className='text-black underline'>
                {usersList.map(user => (
                    <>
                        <li>{user.name}</li>
                        <li>{user.email}</li>
                    </>
                ))}
            </ul>
        </div>
    );
};

export default UserLists;
Here, we have run a map method to the userLists array. And added some styles to show them.
import React from 'react';
const UserLists = ({ usersList }) => {
    return (
        <div className="bg-gray-400 mx-auto my-24 rounded-md shadow-gray-300 shadow-lg w-1/2">
            <ul className='text-black underline'>
                {usersList.map(user => (
                    <>
                        <li>{user.name}</li>
                        <li>{user.email}</li>
                    </>
                ))}
            </ul>
        </div>
    );
};

export default UserLists;
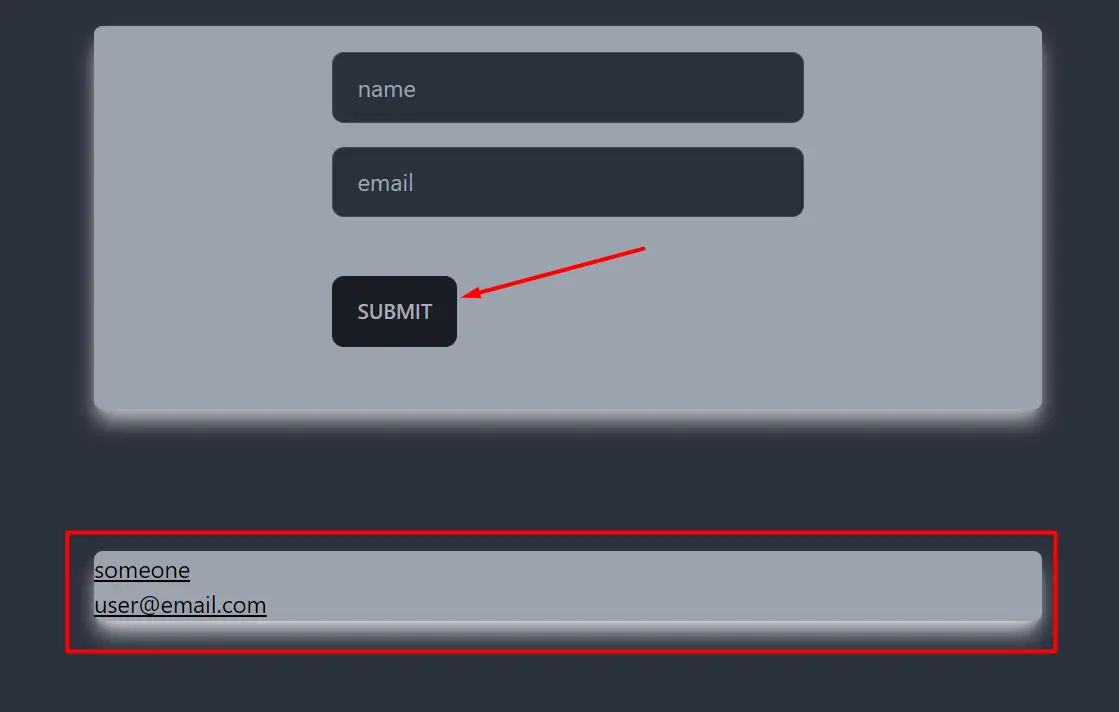
As we can see, the user list is being added here.
