In this tutorial we will learn about how to create React elements and how to nest them, we will use jsx to create react elements.
Deleting Files/Cleaning create-react-app
Create a default React app that was created in the previous tutorial and we will delete some extra unusable file and make changes. This will make the React app customizable and we can render our own elements and components that can be rendered in the browser.
- gitignore
- SVG
- Clear app.js
- Clear app.css
What are the Elements?
=>Elements are the smallest building block of React. The element is the code form of the user interface that we see.
Rendering Ui
- React uses JavaScript to create React elements. We will use these react elements to describe what we want the page to look like
- React will generate the DOM node to achieve the results
- The React code we use is declarative as we describe the look of the page and React does all the implementation.
- All the elements that are created are rendered the division of root id.
- This React-Dom is auto-created in the index.js file as we create the app.
- This file is the major reason we can render our components and elements in the browser.
Code:- index.js
import React from 'react';
import ReactDOM from 'react-dom';
import './index.css';
import App from './App';
import * as serviceWorker from './serviceWorker';

ReactDOM.render(
  <React.StrictMode>
    <App />
  </React.StrictMode>,
  document.getElementById('root')
);

// If you want your app to work offline and load faster, you can change
// unregister() to register() below. Note this comes with some pitfalls.
// Learn more about service workers: https://bit.ly/CRA-PWA
serviceWorker.unregister();
Creating elements with CreateElement function
- React is an extension of javaScript, but it isn’t built into your browser.
- We cannot test React code in browser console we used to do with JavaScript.
- First, we import React and ReactDom
- Create a variable and use React.createElement function to create an element.
- This function takes in three arguments
- First is the attribute of HTML elements like div or h1 or p
- Second is the property of that attribute like className, id etc.
- The third is the text itself.
- And we render this element into the dom using react-dom
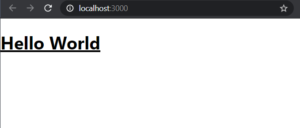
import React from 'react';
import ReactDOM from 'react-dom';

const element = React.createElement('div',{
  className: 'welcome'
},'Hello World')
ReactDOM.render(
  element,
  document.getElementById('root');
)
Note:- This will render if you don’t have index.js file and if u have this file then don’t use ReactDom render

Nested elements
- We can create the nested react element to include multiple elements and render them.
- For this, we pass the third argument as another element as inside and then can pass the arguments as usual.
- And then we can render this element using react-dom again.
- Here we nested the h1 tag with the underline tag
import React from 'react';
import ReactDOM from 'react-dom';

const element = React.createElement('div',null,
React.createElement('u',null,'Hello World'));
ReactDOM.render(
  element,
  document.getElementById('root');
)
Creating react element using JSX
- We don’t need to call the create element function
- We can directly use the HTML syntax of angle bracket to create an element
- We use curly braces around the javascript expression to execute the JavaScript inside the HTML looking JSX.
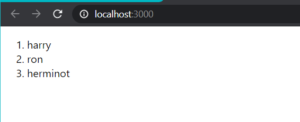
- We displayed the list of elements in the ordered list way.
//Jsx
const people = [
  {name:'Harry'}
  {name:'Ron'}
  {name:'Hermiony'}
]

const element = <ol>
  {people.map((person)=>{
    <li>{person.name}</li>
  })}
</ol>
ReactDOM.render(element,document.getElementById('root'))